A dartboard can look right on a wall and still feel awkward once someone actually stands at the oche. The easiest way to test a darts layout is to mock up the board, throw line, lighting and surrounding movement before you commit to permanent holes.
Checking for hidden electrical cables or pipework before drilling is a safety-critical step; mains electrical work or investigation of wall services should be carried out by a qualified professional in line with UK safety requirements.
The short version
Before drilling, build a temporary version of the whole playing area rather than just holding a board against the wall. Mark the bull height, board outline, throw line, player stance area, door swings, furniture clearance and lighting position. Then stand, aim, retrieve darts and walk through the room as you normally would.
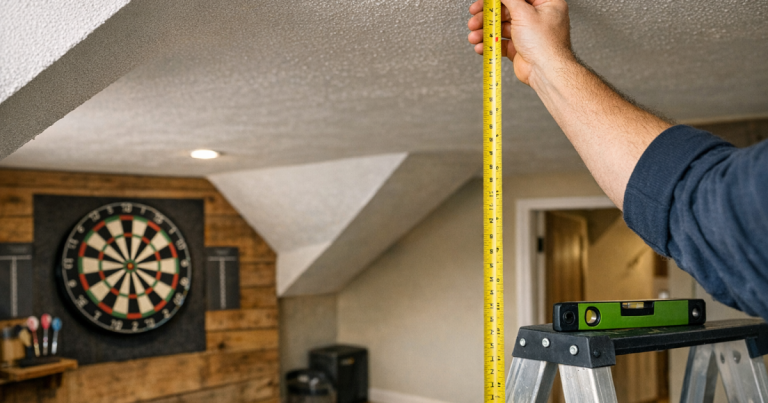
- Mark the bullseye at 1.73 m from the floor.
- Measure the throwing distance from the face of the board, not the wall.
- Use a temporary board template so you can judge height, width and wall coverage.
- Check both the throw and the return route to the board.
- Test the space at the time of day you are most likely to play.
Step 1: choose a likely wall, then test the room around it
Start with the wall that seems most obvious, but do not assume it is right. A good darts wall needs more than a flat surface. You need enough straight throw distance, safe side clearance, room for a mat or oche marker, and a sensible route for people moving through the room.
Stand where the oche would be and look back towards the wall. If the throwing line would cut across a doorway, the bottom of a staircase, a kitchen walkway or the main route to a sofa, it is likely to become annoying even if the measurements technically work. This is where a layout that looks fine on paper can fail in real life.
For awkward rooms, bay windows, cupboard doors and tight alcoves can make a big difference. If your likely wall is near glass, door swings or a narrow passage, use the room-flow checks in planning a darts area around doors and windows before you mark any drill points.
Step 2: mark the bull height without fitting the board
Use a tape measure to mark the bullseye position at 1.73 m from the finished floor level. Mark this lightly with low-tack masking tape or a removable pencil mark. If you will use a darts mat, check whether the mat changes the standing surface enough to matter, then measure from the surface you will actually stand on.
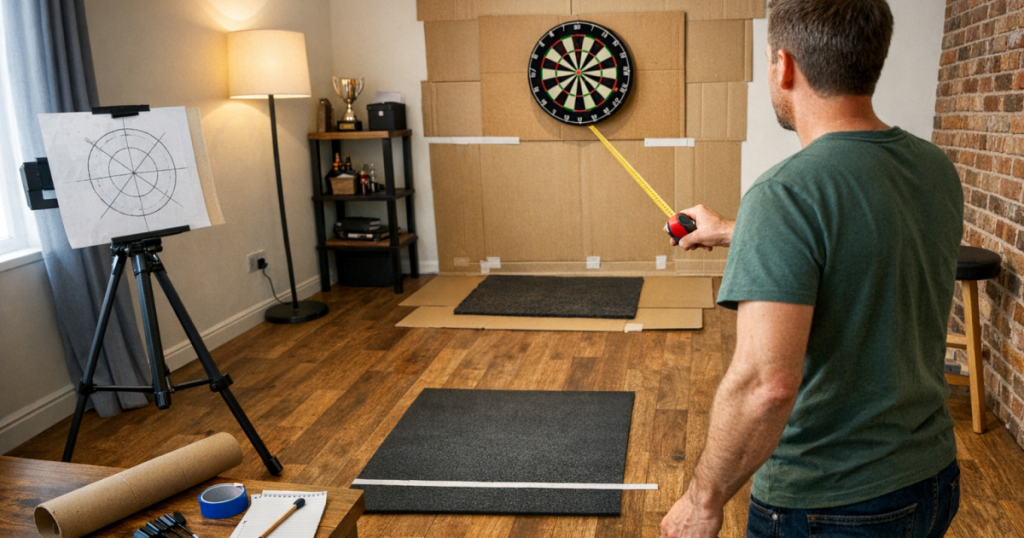
Next, make a simple board template. A piece of cardboard, paper, or several sheets taped together is enough. Mark the centre point for the bull and sketch a rough board circle around it. The aim is not to create a perfect replica; it is to judge whether the board looks naturally placed on the wall and whether there is enough space for a surround, cabinet or scoreboard.
Tape the template to the wall with the bull mark aligned. Step back and look at it from the throw line, from the doorway and from any seating nearby. If the board feels squeezed into a corner now, it will feel worse once darts, a surround and accessories are added.
Step 3: measure the throw from the board face, not the skirting board
The throw distance is one of the most common layout mistakes. For steel-tip darts, the standard throwing distance is 2.37 m from the face of the dartboard to the oche. For many soft-tip home setups, the common distance is 2.44 m, but always check the rules or board guidance you plan to follow.
Because the measurement starts from the face of the board, you need to allow for the depth of the board and mounting. If you measure from the wall only, your oche can end up too close once the board is fitted. A simple way to mock this up is to hold a book or offcut of timber against the wall to represent board depth, then measure from its front face.
Mark the oche with a strip of tape across the floor. Stand behind it in your normal stance, then move through a few slow practice throws without darts. Pay attention to your back foot, elbow space, ceiling height, and whether your follow-through feels restricted.
Step 4: test the oche area as a working zone
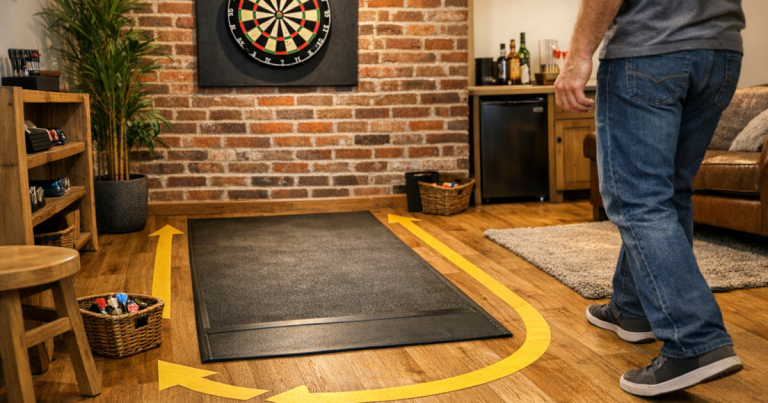
A throw line is not just a line. It is the area where you stand, reset your feet, step aside for another player and occasionally lean forward to collect a bounce-out. A strip of tape is useful, but a temporary mat shape is even better.
Lay down a towel, yoga mat, cardboard strip or spare rug to represent the mat footprint. This shows whether the oche area clashes with furniture, rugs, skirting, radiator pipes or a doorway. It also helps you see whether the room still feels usable when nobody is playing.
If you plan to use a proper mat later, it is worth thinking through the permanent setup now. The guide to creating a match-ready darts mat and oche area covers positioning, throw-line consistency and the small details that make the space feel less improvised.
Step 5: walk the retrieval route
After every visit, someone has to walk from the oche to the board and back. Test that movement before drilling. Walk the route several times as if a leg is in progress: throw, step away, approach the board, pull darts, turn, return to the oche.
Watch for tight spots. A coffee table that is fine for one person may be irritating when two players are swapping places. A cabinet door might open into the retrieval path. A sofa arm may sit exactly where a right-handed player naturally steps after throwing.
If you have children, pets or other people regularly using the room, test the layout while the room is in its normal state rather than perfectly tidied. A home darts area has to work on an ordinary evening, not just during a one-off measuring session.
Step 6: check side clearance and wall protection
Side clearance matters because not every dart lands in the board. Newer players, guests and tired arms can send darts wider than expected. With your template still on the wall, mark the likely outer edge of a surround or cabinet. Then stand at the oche and look at what sits around it: light switches, picture frames, shelves, televisions, windows and plaster corners.
A surround needs enough wall around the board to sit flat. A cabinet needs room for its doors to open. If you plan to hide the board between sessions, test that the opened doors will not hit shelves, curtains or wall lights.
For a shared family room, it is sensible to leave more side protection than you think you need. The layout should cope with casual throwers as well as your own normal accuracy.
Step 7: test lighting before deciding the final height and position
Lighting can make or break a darts setup. A board that is technically in the right place can be unpleasant to use if a ceiling pendant throws a shadow across treble 20 or if a wall light shines into the player’s eyes.
Test at the time you expect to play. Turn on the room lights, close curtains if that is how the room is normally used in the evening, and stand at the oche. Check whether your body casts a shadow on the board. Then stand close to the wall and see whether a cabinet, surround or future lighting ring would have room to sit without clashing with the ceiling, coving or shelves.
If the wall position is almost right but the board is hard to see, sort the lighting plan before drilling. The step-by-step advice on lighting a dartboard properly at home will help you avoid glare, uneven shadows and awkward fixture placement.
Step 8: listen for noise and vibration
Even a well-placed board can be a poor choice if it sits on a shared wall or a thin partition. Before drilling, simulate impact noise. You do not need to throw darts at the wall. Tap the board template area firmly with your knuckles, then have someone listen in the next room if possible.
Noise is most noticeable late in the evening, so test when the house is quiet. Listen for sharp tapping, low vibration and any rattling from picture frames, shelves or radiator pipes. If the wall sounds lively before a board is fitted, a hard-mounted dartboard may transmit more sound than you expect.
This does not automatically rule the wall out, but it may affect how you mount the board, whether you use a backing panel, and whether a different internal wall would be kinder to the rest of the home.
Step 9: do a full dry run with real movement
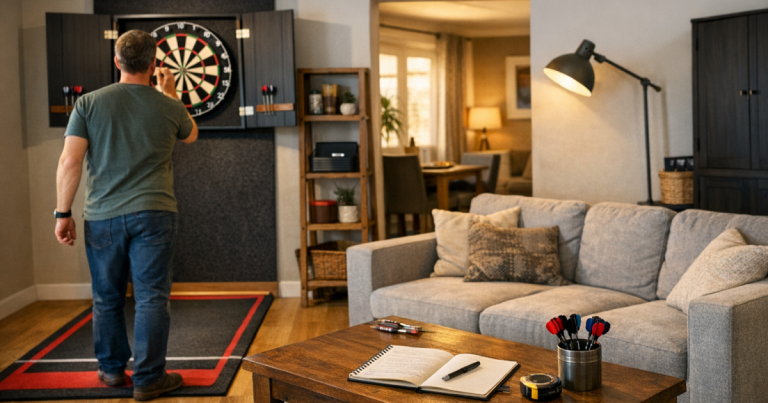
Once the template, throw line and lighting feel right, run through a realistic mini-session. Use safe, slow practice motions without releasing darts unless you already have a temporary board safely mounted. Have one person stand at the oche while another moves around the room as they normally would.
Ask a few simple questions during the dry run:
- Can a player stand naturally without twisting around furniture?
- Can another person pass behind the player without brushing them?
- Is the board visible without leaning or squinting?
- Is there a clear place for darts, flights, chalk, a scorer or a tablet?
- Can the board area be left set up without making the room feel cluttered?
If the answer to one of these is no, adjust the temporary layout and test again. Moving tape takes seconds. Moving a drilled bracket is a repair job.
Step 10: mark drilling points only after the layout has passed
When the dry run works, keep the bull mark in place and use the actual mounting hardware as the final reference. Hold the bracket or board mount against the wall according to the manufacturer’s fitting instructions, then mark the fixing points carefully.
Before drilling, confirm three things: the bull height is still correct, the oche distance is measured from the board face, and the wall is suitable for the fixings you intend to use. Plasterboard, masonry and timber all behave differently, so use fixings appropriate to the wall type and the board or cabinet load.
Take a final photo of the taped layout before removing anything. It gives you a quick reference if tape lifts, someone cleans the area, or you decide to revisit the setup later.
Common layout problems spotted during testing
The board is too close to a corner
Corners can make the throw feel tight, particularly for players whose arm naturally travels slightly across the body. If the board is close to a side wall, test both right-handed and left-handed throwing positions before committing.
The oche blocks the room
If the taped throw line cuts through the main walking route, the setup may become frustrating even if it is accurate. Try shifting the board to another wall or rotating the playing lane so darts does not dominate the room when not in use.
The wall works, but the accessories do not
A bare board template may fit, but a cabinet, surround, scoreboard or lighting can change the footprint. Test the whole planned arrangement, not just the board centre.
The lighting looks fine in daylight only
Many home boards are used in the evening. If you only test in daylight, you may miss shadows, glare and reflections from nearby glass or framed pictures.
Things readers ask
Can I test the layout without owning the dartboard yet?
Yes. Use a paper or cardboard template with a marked bullseye and approximate board outline. It will not replace the final fitting instructions, but it is enough to test height, space and room flow.
Should I mark the throw distance from the wall or the front of the board?
Measure from the front face of the dartboard. If you measure from the wall, the oche will usually end up too close once the board is mounted.
How long should I leave the temporary layout in place?
Leave it for at least a normal evening if you can. You will quickly notice whether the oche blocks a walkway, whether the board wall feels intrusive, or whether lighting changes after dark.
What if the only available wall is a shared wall?
Test for vibration before drilling and think carefully about mounting. A backing panel, different wall, or noise-reducing approach may be needed if tapping already travels through clearly.
Can I use adhesive hooks instead of drilling?
Adhesive fixings are not a dependable choice for a permanent dartboard. Use the board or cabinet manufacturer’s fitting guidance and fix into a suitable wall structure with appropriate fixings.
What to remember
A good darts layout is measured, but it is also lived in. The correct bull height and throw distance are only the starting point. The setup also needs comfortable movement, sensible wall protection, clear lighting and a throw line that does not fight the rest of the room.
Mock everything up first: board, oche, mat area, accessories and walking routes. Once the taped version feels natural during a proper dry run, drilling becomes a much more confident final step rather than a hopeful first one.