A darts oche only works properly if it is clear, repeatable and measured from the right point. The safest way to mark a throw line on finished flooring is to use a removable, low-tack marker that sits on the surface rather than anything permanent, sharp or heavily adhesive.
For most home setups, that means painter’s tape, a removable floor strip, a dart mat, or a non-adhesive marker that can be lifted when you are finished playing. The right choice depends on whether you have laminate, timber, vinyl, tile, carpet or concrete underfoot.
The short version
- Measure the throwing distance from the face of the dartboard, not from the wall, skirting board or cabinet.
- For steel-tip darts, the standard throwing distance is 2.37 m from the board face to the front edge of the oche line.
- Use low-tack, removable materials first; avoid duct tape, packing tape and permanent markers.
- Test any adhesive in a hidden spot before putting it across the playing area.
- For delicate floors, use a dart mat or weighted temporary strip rather than sticking anything down long term.
Step 1: confirm the board position before marking the floor
Do not start with the floor. Start with the dartboard. If the board is not fixed in its final position, your oche line will be wrong as soon as the board moves.
For a standard steel-tip home setup, the bullseye should be 1.73 m from the floor. The throwing distance is then measured horizontally from the face of the dartboard to the front edge of the throw line. If the board sits inside a cabinet or on a backboard, ignore the wall behind it and measure from the playing face itself.
A simple way to do this is to drop a plumb line or straight edge down from the front face of the board, mark that point lightly on the floor with a removable note or small piece of tape, then measure 2.37 m out into the room. If you are still planning the full lane, the guide to setting out your darts throwing area and oche is a useful next step.
Also check that the line is square to the board. A line that is the correct distance at one end but angled across the floor can make your stance feel odd and will give different distances depending on where you stand.
Step 2: choose a floor-safe marking method
The best option is the one that stays visible during play but removes cleanly afterwards. Permanent paint, marker pen, staples, tacks and aggressive tape are unnecessary for a normal home darts setup.
For laminate, vinyl and sealed timber floors
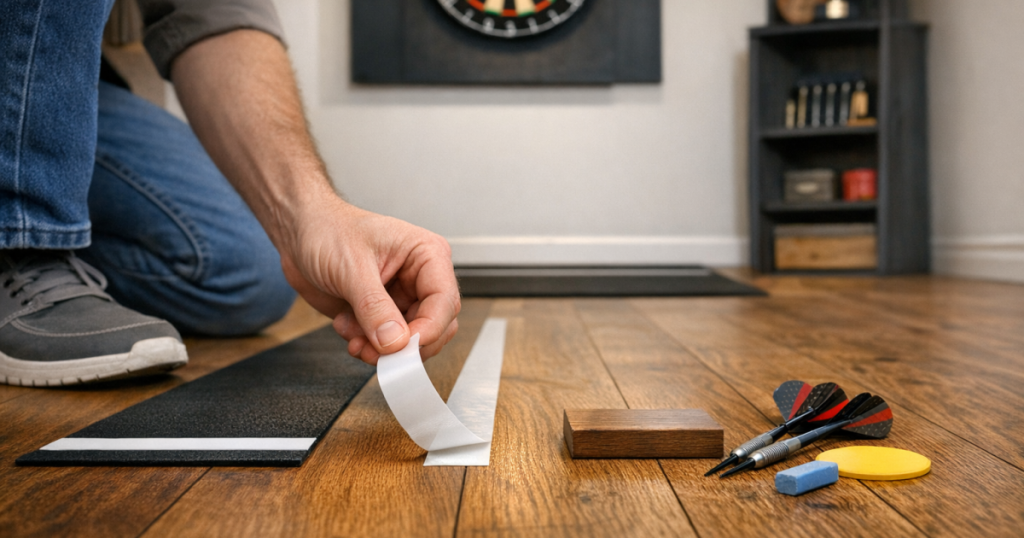
Use a low-tack painter’s tape or a removable floor-safe tape, and test it first in a hidden corner. Do not leave adhesive down for weeks at a time, particularly on floors that get direct sun, underfloor heating or frequent cleaning. Heat and time can make even gentle adhesives harder to remove.
If the floor finish is expensive, newly laid or unknown, avoid adhesive altogether. A slim dart mat, a non-slip runner, or a weighted strip placed at the correct distance is usually the safer approach.
For carpet
Carpet is forgiving in some ways but awkward in others. Tape may not stick evenly, and some adhesives can pull fibres or leave residue. A dart mat is usually the neatest answer because it gives you both a visible line and a consistent standing surface.
If you use a temporary strip, make sure it lies flat and does not curl at the edges. A raised lip can be useful as a toe reference, but it should not create a trip point in a busy room.
For tile and stone
Smooth tile is often easy to mark temporarily with removable tape, but grout lines can make the strip uneven. Clean and dry the surface first, then run the line across the tile rather than relying on grout as your visual marker.
Avoid strong solvents when removing residue. Use a cleaner suitable for the floor type and follow the flooring manufacturer’s care advice.
For concrete garage floors
Concrete gives you more freedom, but it can also be dusty or damp. Tape will lift quickly if the surface is powdery, cold or moist. Clean the area first and let it dry properly before applying anything adhesive.
If your darts area is in a garage, keep an eye on moisture generally. Damp floors and cold air can affect more than the oche line, so it is worth planning storage and ventilation as part of the setup.
Step 3: lay the line neatly
Once the distance is measured, mark both ends of the oche line lightly. Use a tape measure from the board face to each end so the line stays parallel with the board.
For a home setup, a line around 60 cm to 90 cm wide is usually visible enough without dominating the room. The key point is that the front edge of the line is the legal reference: your toe should stay behind that front edge when throwing.
- Clean the floor with a suitable mild cleaner and let it dry.
- Measure 2.37 m from the face of the board for a standard steel-tip setup.
- Place small temporary marks at both ends of the line.
- Apply the tape or strip in one straight run, using the front edge as the oche.
- Press it down gently rather than burnishing it hard into the floor.
- Add a small centre mark if you like to line up with the bullseye before each visit.
If you play soft-tip darts, check the throwing distance for your board and rules before marking the floor. Many soft-tip setups use a longer distance than steel-tip, so do not assume the same measurement applies.
Step 4: use a non-adhesive oche where the floor matters most
Some floors are not worth risking with adhesive. Freshly finished timber, luxury vinyl, rented flooring and high-gloss surfaces are better served by something removable that rests on top.
A dart mat is the simplest option because it can define the throwing position, protect the standing area and be rolled away after play. The trade-off is that it must stay in place. If the mat creeps forward during a session, the line stops being accurate, so check its position regularly.
A weighted straight edge can also work if it is low enough not to trip over and soft enough not to mark the floor. Rubber-backed strips should be checked carefully on pale vinyl or sealed wood, as some materials can leave discolouration if left down for long periods.
Step 5: make the line suit the room
A good oche marker should fit the way the room is used. In a spare room, a neat strip of removable tape might be fine. In a lounge, a roll-away mat may be better. In a rented flat, anything that lifts cleanly and leaves no trace is the priority.
Also think about the dartboard location before committing to a floor mark. If you are still deciding between walls, read how to choose the right wall for your dartboard before measuring and marking. Moving the board even slightly can shift the line and make your first attempt redundant.
For rental homes, the throw line is only one part of the damage-free setup. If you also need to avoid drilling into walls, a no-drill dartboard setup for renters can help you keep the whole area temporary and reversible.
Step 6: check it after the first few sessions
The first night of use tells you a lot. Watch whether the line lifts, slides, catches shoes or collects dust. If it starts to peel, replace it rather than pressing dirty adhesive back into the floor.
- Re-measure the distance after moving furniture, mats or the dartboard stand.
- Lift one corner after 24 hours to check for residue or finish reaction.
- Remove adhesive markers slowly, pulling back over themselves rather than straight upwards.
- Do not leave temporary tape down indefinitely; replace it periodically.
- Keep the throwing area clear so the line does not become a trip hazard.
If you share the room with family or housemates, choose a marker that is obvious during play but easy to remove afterwards. A visible line is useful when throwing; a permanent stripe across the lounge floor is less welcome.
Common examples
Laminate in a spare bedroom
Use low-tack tape for short sessions, then lift it after play. If you practise daily, switch to a roll-out mat to reduce repeated adhesive use.
Carpeted box room
A dart mat is usually better than tape. Align the printed or front edge to the measured oche point and check that the mat has not crept forward before each session.
Garage concrete
Clean and dry the floor first. Removable floor tape can work well, but it will not last on dusty or damp concrete. A mat is more reliable if the surface is rough.
Things readers ask
Can masking tape damage laminate flooring?
It can if it is too sticky, left down for too long, exposed to heat, or pulled up aggressively. Use low-tack tape, test first, and remove it slowly after play.
Where exactly should the front of the line be?
The front edge of the line should be 2.37 m from the face of a standard steel-tip dartboard. Your foot must stay behind that front edge when throwing.
Is a raised oche better than a tape line?
A raised oche gives a clearer toe stop, but it is less discreet and can be a trip hazard in a shared room. For most homes, a flat removable line or mat is easier to live with.
Can I use chalk instead of tape?
Chalk can work on some concrete floors for a very temporary line, but it is messy on carpets and may mark porous surfaces. Test it before using it in a finished room.
How often should I re-check the distance?
Re-check whenever the board, stand, cabinet, mat or room layout moves. It only takes a small shift to make the oche inaccurate.
Key takeaways
The best damage-free throw line is measured carefully, visible during play and easy to remove without residue. Start with the board face, measure the correct distance, then choose a marker that suits the flooring rather than forcing the same tape onto every surface.
If the room is temporary, rented or shared, keep the oche reversible. A clean removable strip or well-positioned dart mat will give you a consistent throwing point without leaving the floor looking like a permanent practice lane.