A tidy darts area can still take a surprising amount of punishment, especially if the board is used by guests, children learning the game, or anyone testing new darts. The simplest way to protect walls around dartboard areas is to combine a proper surround with sensible side coverage and low-level protection near the skirting. It does not have to look like a pub wall; the aim is to catch realistic misses without turning the room into a workshop.
Electrical checks and any permanent fixing that could affect hidden wiring, pipework or wall structure should be carried out by a qualified tradesperson to comply with UK safety requirements and appropriate fixing standards for the wall type.
At a glance
- Use a dartboard surround as the first layer of defence, but do not rely on it to catch every wide dart.
- Add side protection where your throwers most often miss: usually around shoulder height and slightly outside the board’s outer edge.
- Think about skirting boards separately, because low bounce-outs and dropped darts damage them in a different way.
- Use removable or freestanding solutions in rented homes, shared living rooms and multipurpose spaces.
- Check lighting, throwing position and board height before adding more protection, as poor setup can increase stray darts.
Step 1: Work out where darts are actually landing
Before adding panels, cork or padding, spend a few sessions watching where the damage risk really is. Most wall marks come from three situations: darts sliding past the outer scoring area, bounce-outs dropping into the lower wall area, and players standing off-centre because furniture or flooring gets in the way.
Look for tiny holes, shiny scuffs, chipped paint or dents in plaster. Pay attention to both sides of the board rather than assuming the wall needs equal coverage. A right-handed group, for example, may miss differently from a mixed group of casual players. If guests often play after a drink or younger players are learning, allow more generous coverage than you would for one experienced thrower practising alone.
A quick paper test helps. Tape a few sheets of plain paper around the board for one evening, then mark where darts hit or scrape. This shows whether you need a wider surround, side panels, a lower catch area, or better control of the standing position.
Step 2: Fit the right first layer around the board
A dartboard surround is usually the neatest first step because it protects the wall closest to the board without changing the throw. It also keeps the setup looking intentional, which matters if the board is in a dining room, spare room or shared lounge.
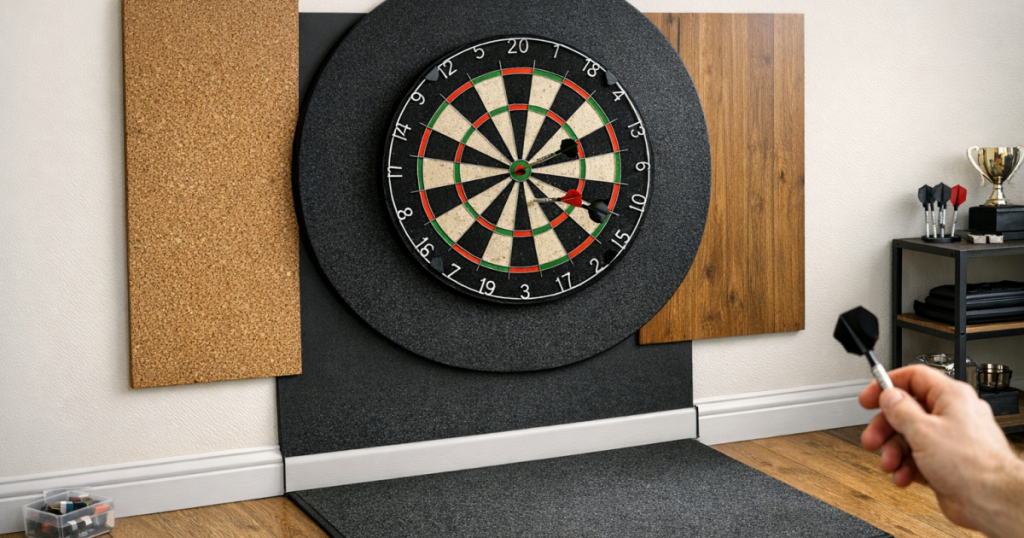
Standard ring surrounds cover the area immediately outside the board. They are ideal when the board is used by reasonably consistent players and the wall is otherwise clear. For less confident throwers, a larger surround or backing panel gives more forgiveness. If you regularly see darts land well outside a normal ring, it is worth reading more about oversized dartboard surrounds before changing the whole wall layout.
Check that the surround sits flat, does not push the board forward unevenly, and leaves the scoring area unobstructed. A surround that sags, twists or sits proud of the board can become annoying during play and may even encourage darts to rebound awkwardly. If your wall is uneven, a backing board behind the dartboard can sometimes give a cleaner, more stable finish.
Step 3: Add side coverage without overbuilding the room
Wall protection does not need to cover an entire feature wall. The useful area is normally a vertical zone around the board, extending out to either side where missed darts travel. In a family home, a discreet pair of side panels can be more acceptable than a single huge sheet of material.
Good side protection options include cork tiles, felt-covered panels, slim timber backing boards, acoustic-style panels, or a purpose-made darts backboard. The right choice depends on the room. Cork is easy to cut and replace, but it can look busy if used across a large wall. Fabric-covered panels can blend better with home décor, but they need to be dense enough to slow a dart rather than simply hide the mark. Timber or MDF backing can look smart when painted, though permanent fixing needs more care.
Avoid very hard, glossy or brittle materials directly around the board. They may protect the paint, but they can increase bounce-back or leave visible chips. The surface should accept light dart contact, absorb small impacts and be easy to refresh. If you paint a protective board, keep spare paint for touch-ups so the area does not look tired after a few months of play.
Step 4: Deal with skirting boards as their own problem
Skirting boards are often damaged by low bounce-outs, dropped darts and players picking darts up with the points facing down. Standard wall surrounds rarely protect this area, so it needs a separate plan.
The easiest option is a sacrificial strip in front of the skirting. This could be a slim timber batten, a removable foam strip, a section of dense rubber matting, or a low-profile kick board fixed to a freestanding back panel. The key is to make it easy to replace. A small scuffed strip is far less annoying than chipped painted skirting running along the wall.
If the dartboard is above a hard floor, also think about where darts land after hitting the wire or falling from the board. A dart can bounce off laminate, tile or bare floorboards and strike the skirting at an awkward angle. For that wider issue, the guide to protecting floors beneath a dartboard from bounce-outs is a useful next step, because floor and skirting protection work best when planned together.
Step 5: Keep furniture, doors and corners out of the firing line
Many wall protection problems are really layout problems. A board squeezed beside a door frame, bookshelf or radiator creates awkward throwing angles and leaves nearby edges vulnerable. If players cannot stand square to the board, misses become less predictable.
Check that the oche line is clear, the player can stand comfortably, and nobody has to lean around furniture. Even small obstructions can change the release angle. In a shared living room, a portable oche marker or darts mat can help everyone throw from the same place, reducing random wide misses and keeping the protection zone more predictable.
Pay particular attention to external corners, chimney breasts and alcoves. A dart striking the edge of a plastered corner can chip it more visibly than a flat wall. Corner guards can help, but choose a finish that will not create sharp rebounds. If a board has to sit near a corner, wider soft side coverage is usually better than a hard plastic edge directly in the likely impact area.
Step 6: Choose removable protection for rented or shared spaces
Not every home setup can be permanent. In rented accommodation, student houses or multipurpose rooms, the best protection is often something that comes away cleanly. Freestanding dartboard stands, folding back panels and removable wall pads can reduce marks without drilling into the wall.
For skirting, consider a weighted floor strip or a section of matting that sits against the board-side wall while you play. It should be stable enough not to curl or trip anyone, but easy to lift away afterwards. If you use adhesive products, test them in a discreet area first and remember that paint condition matters; even good removable strips can lift weak or recently applied paint.
A folding screen behind the board can work well where darts is only one use of the room. It will not look as seamless as a mounted surround, but it can be practical for occasional matches and avoids making the darts setup dominate the room.
Step 7: Check board mounting, cabinet fit and surrounding trim
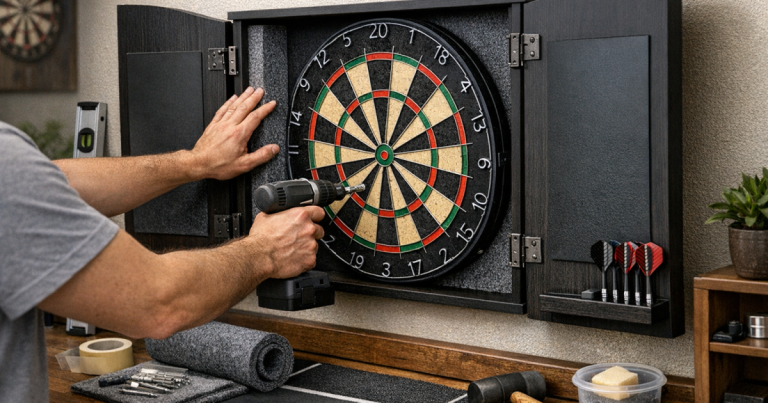
A loose board, poorly fitted cabinet or uneven surround can make wall damage worse. If the board moves when darts are pulled out, the surround can rub the wall and the board may sit out of alignment. If a cabinet door sits too close to the throwing line or swings into the protection area, it can become another surface to mark.
Make sure the board is secure, level and sitting flat against its mount. If you use a cabinet, open both doors fully and check whether they expose vulnerable painted wall at the sides. Some cabinet setups look tidy when closed but offer less protection during actual play than a plain surround and backing board. The common issues covered in dartboard cabinet and surround problems are worth checking before you commit to a layout.
Also look at trim pieces and decorative mouldings. Darts can catch raised picture rails, panelling edges or dado rails. If these sit close to the board, soft protection over the trim may be more effective than trying to patch the paint later.
Step 8: Reduce misses by improving the playing conditions
Protection catches damage, but the best setup also reduces the number of stray darts. Poor lighting, glare, shadows and cramped footing all increase the chance of a throw going wide. A player who cannot clearly see the treble bed, or who is standing on an uneven rug, is more likely to clip the wire or miss the board entirely.
Keep the area around the oche clear, use consistent lighting and avoid placing the board where people walk behind the thrower. If the wall is dark, a lighter surround or backing area can help the board stand out. If the wall is very light, marks will show quickly, so a darker protective zone may age better.
It is also worth setting simple house rules: darts go point-up or in a case when not in use, no throwing while someone retrieves darts, and no casual lobs from the sofa. Those habits protect the room as much as the equipment.
Questions people ask
How wide should wall protection be around a dartboard?
For confident players, a standard surround may be enough. For mixed household use, add extra side coverage beyond the surround, especially at the height where missed darts naturally travel. Use actual impact marks to decide rather than guessing.
Can I protect skirting boards without fixing anything permanently?
Yes. A removable rubber strip, dense mat edge, weighted timber strip or freestanding lower panel can protect skirting during play and be moved afterwards. Make sure it sits flat and does not create a trip hazard.
Is cork good for dartboard wall protection?
Cork can work well for light impacts and is easy to replace in sections. Use enough thickness and support so darts do not simply punch through into the wall behind.
Will a dartboard cabinet protect the wall?
A cabinet protects some side areas while open, but it does not always cover the lower wall, outer edges or skirting. Check the real open-door footprint before relying on it as your only protection.
What should I do if the wall is already marked?
Fill small holes, touch up paint, then add protection before the next session. If the plaster is badly damaged or crumbly, repair the surface properly before mounting anything over it.
Why it matters
Good wall and skirting protection makes a home darts setup easier to enjoy. It keeps the room presentable, reduces arguments in shared spaces and saves you from constantly patching small dents. Start with the likely impact zones, add protection only where it earns its place, and keep the setup comfortable to throw from. The result is a darts area that feels ready for regular play without looking overbuilt.