Getting dartboard height and distance right is one of the quickest ways to make a home setup feel fair, consistent and enjoyable. A board that is only slightly high, low or too close can change your throw more than you might expect. The key is to measure from the correct points, not just from the wall or the front of a cabinet.
For a standard steel-tip home setup, set the centre of the bullseye at 1.73 m from the floor and the toe line at 2.37 m from the face of the dartboard. For many soft-tip setups, the board height is also 1.73 m, while the throwing distance is commonly 2.44 m; always check the rules for the board, league or format you plan to use.
What to know first
- Board height: measure vertically from the floor to the centre of the bullseye, not to the top or bottom of the board.
- Steel-tip throwing distance: measure 2.37 m horizontally from the face of the board to the front edge of the toe line.
- Soft-tip throwing distance: 2.44 m is commonly used, but house rules and electronic board formats can vary.
- Steel-tip diagonal check: the distance from the centre of the bullseye to the toe line should be about 2.93 m.
- Measure from the board face: cabinets, surrounds and wall brackets can make the wall-to-line measurement inaccurate.
Tools that make the job easier
You do not need specialist kit, but you do need to be methodical. A long tape measure, pencil, masking tape, spirit level and a straight edge are usually enough. A plumb line is useful if the board is already fitted and you need to find the true point on the floor directly beneath the board face.
If you are setting up on carpet, check that the tape measure is pulled straight and not dipping into the pile. On hard flooring, masking tape can mark temporary positions before you commit to a permanent oche, mat or floor marker.
Step 1: mark the bullseye height
Start with the dartboard off the wall if you are fitting it for the first time. Measure 1.73 m up from the finished floor surface and mark the wall lightly. That mark should line up with the exact centre of the bullseye once the board is mounted.
This is where many home setups go slightly wrong. The measurement is not taken to the centre of the bracket, the top of the number ring, the outer edge of the board or the middle of the cabinet. It is the centre of the bullseye that matters.
If your board sits inside a cabinet, check that the cabinet allows the board to hang at the correct height and still open cleanly. For a more detailed planning check before you drill or reposition anything, use this guide to dartboard cabinet dimensions and clearance.
Step 2: make sure the board face is the measuring point
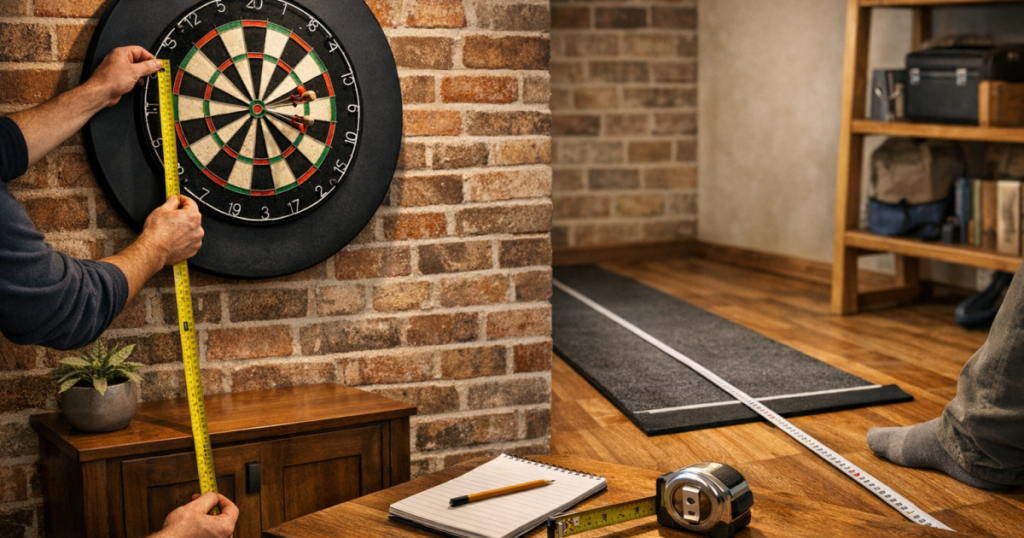
The throwing distance is measured from the front face of the board, not from the wall behind it. This matters because a board on a bracket, inside a cabinet or behind a surround sits forward from the wall. Measuring from the wall can leave the player standing too far back or, more commonly, too close.
To find the correct floor line, hold a straight edge vertically against the board face and let it drop towards the floor, or hang a plumb line from the face of the board. Mark the point directly below the board face on the floor. That is your starting point for the throw distance.
Step 3: measure the toe line accurately
From the floor point directly below the board face, measure straight out along the floor to the front edge of the toe line. For steel-tip darts, that front edge should be 2.37 m from the board face. The front edge is the side closest to the player’s toes, so players stand behind it rather than on or beyond it.
Keep the tape measure at floor level and square to the wall. If the tape is angled across the room, the distance will be longer than it appears. A second person can help by holding the tape at the board-face mark while you set the line, but you can also tape the end down temporarily.
If you are still deciding whether to use a raised oche, tape line or darts mat, the separate guide to oche measurements and toe-line alignment goes deeper into the rules and practical layout details.
Step 4: use the diagonal measurement as a confidence check
Once the board and toe line are marked, check the diagonal from the centre of the bullseye to the front edge of the toe line. For a standard steel-tip setup, this should be about 2.93 m. This is a useful way to catch errors caused by uneven flooring, a board that is not mounted at the intended height, or a tape measure that was not held straight along the floor.
The diagonal check should support your vertical and horizontal measurements, not replace them. If the diagonal looks wrong, recheck the bull height first, then confirm that your floor mark starts directly below the board face rather than below the wall.
Step 5: fix the line so it does not move
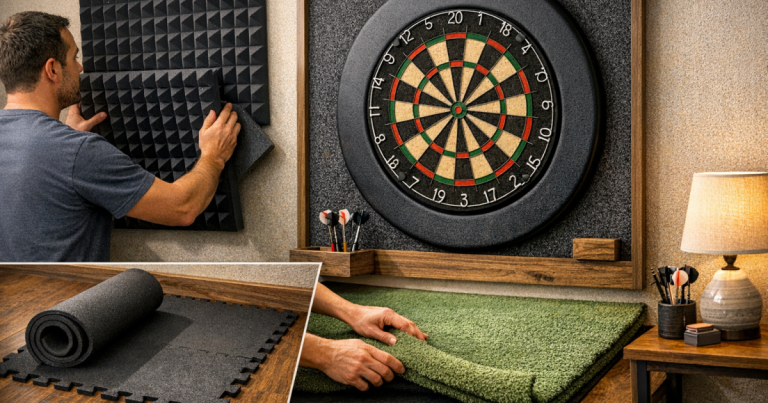
Temporary masking tape is fine while you test the space, but it can peel, stretch or move during regular play. Once you are happy with the measurement, make the toe line more permanent. A darts mat, low-profile oche strip or clearly marked floor line will stop the setup drifting over time.
For many UK homes, the floor surface affects the decision. A mat on carpet can creep forward unless it has enough grip, while a hard floor may need a mat that protects the surface and stays flat at the edges. If your room doubles as a living space, choosing the right mat can also make packing away easier. The guide to darts mat materials and floor suitability covers those trade-offs in more detail.
Common measuring mistakes in home setups
Measuring from the wall instead of the board
This is the classic mistake. The board face can sit several centimetres proud of the wall, especially with a cabinet or surround. Always project the board face down to the floor first, then measure outwards.
Marking the toe line at the wrong edge
The front edge of the line is the official boundary. If you mark the back edge of a thick oche or mat line at 2.37 m, the player may actually be standing closer than intended.
Trusting the cabinet centre rather than the bullseye
Cabinets, backing panels and doors are not always a reliable reference. Measure the board itself after it is fitted, and rotate it so the 20 segment is at the top before checking.
Ignoring skirting boards and uneven walls
Skirting boards can push tape measures away from the wall and create a false reading. Since the correct starting point is the board face, use a plumb line or straight edge rather than trying to measure from skirting.
Forgetting the room behind the thrower
The toe line is not the end of the space you need. Allow comfortable standing room behind it so players are not pressed against furniture, doors or a walkway. A cramped stance can make an otherwise accurate setup feel awkward.
Steel-tip and soft-tip measurements at a glance
- Steel-tip board height: 1.73 m from floor to bullseye centre.
- Steel-tip throw distance: 2.37 m from board face to front edge of toe line.
- Steel-tip diagonal: about 2.93 m from bullseye centre to toe line.
- Soft-tip board height: commonly 1.73 m from floor to bullseye centre.
- Soft-tip throw distance: commonly 2.44 m from board face to front edge of toe line.
- Soft-tip diagonal: commonly about 2.99 m, depending on the rule set used.
If your setup is purely for casual home play, consistency matters most: choose the correct format, measure it carefully and keep it the same. If you are practising for a pub league, competition or specific soft-tip format, match the measurements used by that setting.
A simple measuring routine
- Mark 1.73 m on the wall for the bullseye centre.
- Mount the board and confirm the bullseye sits on that mark.
- Check the board is flat, secure and correctly rotated.
- Project the board face down to the floor with a straight edge or plumb line.
- Measure 2.37 m from that point for steel-tip play, or the required distance for your soft-tip format.
- Mark the front edge of the toe line clearly.
- Check the bull-to-line diagonal.
- Test the stance area and make sure there is enough space behind the player.
- Fix the line with a mat, oche strip or durable floor marker once you are satisfied.
Things readers ask
Do I measure throwing distance from the wall or the dartboard?
Measure from the face of the dartboard. If the board is in a cabinet or on a bracket, the wall is behind the correct measuring point.
How exact does the setup need to be?
Aim to be within a few millimetres. Casual players can still enjoy a slightly imperfect setup, but accurate measurements make practice more reliable.
Can I just use the diagonal measurement?
Use it as a check, not as the only measurement. Set the bull height and floor distance first, then confirm with the diagonal.
Is the soft-tip distance always 2.44 m?
It is a common soft-tip distance, but formats can vary. Check the board instructions, venue rules or competition rules you want to match.
Does a darts mat replace measuring?
No. A mat helps keep the toe line consistent, but you still need to position it from the board face before relying on the printed line.
Key takeaways
Correct measurement is less about complicated tools and more about using the right reference points. Set the bullseye centre at 1.73 m, measure the throwing line from the board face, and use the diagonal to confirm the setup. Once the line is fixed and the stance area feels comfortable, your home oche will be much easier to practise on consistently.
That is the practical heart of dartboard height and distance: measure from the bull, measure from the board face, and make the toe line stable enough that it stays put every time you play.