A darts area can feel wrong before you can pin down why: your shoulder tightens, your front foot lands awkwardly, or someone has to squeeze past mid-leg. The fix is not always a bigger room; a cramped darts setup often improves when you adjust the throw line, clear the approach, tidy the sightline and make better use of the wall space around the board.
Start by treating the area as a playing lane, not just a board on a wall. Once you can stand, throw, retrieve darts and score without dodging furniture or door swings, even a modest spare room, garage corner or dining-room wall can feel far more usable.
The short version
- Check the official board height and throwing distance before moving anything else.
- Clear a simple lane from the oche to the board, including the space your arm and shoulder need to move naturally.
- Move scoring, spare darts and accessories onto the wall rather than nearby shelves or tables.
- Look for hidden pinch points: cabinet doors, skirting boards, rugs, low ceilings, light glare and doorways.
- Test changes with a real throwing routine before drilling new holes or committing to a layout.
Step 1: Reset the measurements before blaming the room
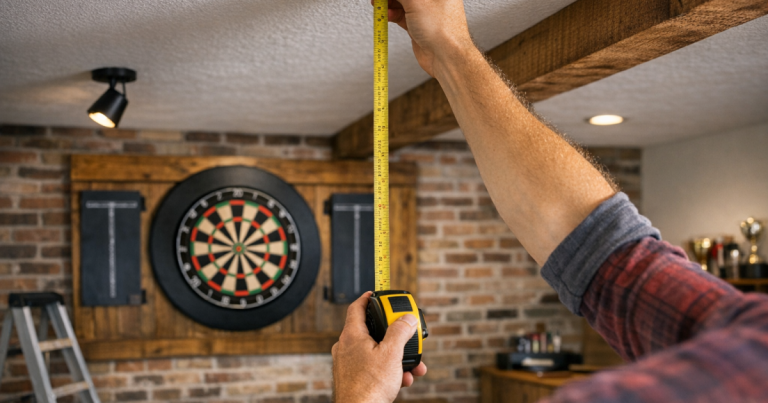
A room can feel cramped simply because the board or throw line is slightly wrong. For a standard steel-tip setup, the centre of the bull should be 1.73 m from the floor, and the front of the oche should be 2.37 m from the face of the dartboard. Measure from the board face, not from the wall, because cabinets and mounting depth can shift the board forward.
If your toe line has drifted closer over time, the throw can feel rushed and upright. If it is too far away, players may lean, overreach or step into furniture while trying to find rhythm. A proper re-measure is the quickest way to separate a genuine room problem from a layout error.
Floors in UK homes are not always perfectly level, especially in garages, older terraces and converted spaces. If the board area spans different floor heights, follow a consistent measuring method rather than guessing from the nearest skirting board. For a more precise approach, use this guide to measuring dartboard height on uneven flooring.
Step 2: Think in terms of a throwing lane
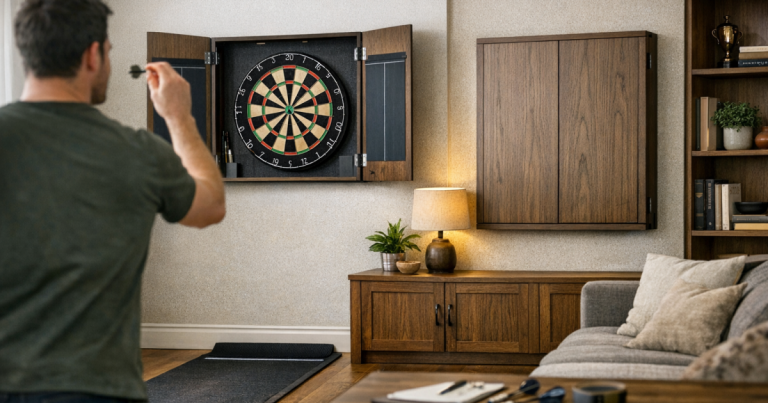
The most useful mental shift is to stop seeing the setup as a single point on a wall. A comfortable darts space needs a lane: board, oche, standing area, follow-through, retrieval route and scoring position. If any one of those points is blocked, the whole setup can feel tight.
Mark the throwing line with masking tape and stand at it as if you are in a proper leg. Bring your darts up, pause, throw three imaginary darts, then step forward to retrieve them. Notice what your elbow, shoulder, back foot and hip are doing. If you are turning sideways to avoid a sofa arm or shortening your throw because a cupboard is close, the problem is not the board position alone.
As a comfort target rather than a formal rule, try to keep enough clear width around the oche for a relaxed stance and a safe step-off after throwing. In a narrow room, one side can be tighter than the other, but the player should not feel forced into a single rigid foot position. The best small setups usually protect the lane first and make everything else fit around it.
Step 3: Remove the small pinch points
Cramped darts areas are often caused by several minor obstructions rather than one obvious problem. A chair leg, speaker stand, laundry basket or low side table might not look intrusive until it sits exactly where your back foot wants to go.
Work through the area in three zones:
- The board zone: keep the wall around the board visually clean and avoid anything that pulls the eye away from the trebles.
- The oche zone: remove furniture, curled rugs, trailing cables and storage boxes from where players stand and step away.
- The retrieval zone: make sure players can walk to the board without brushing past sharp corners, open doors or stacked items.
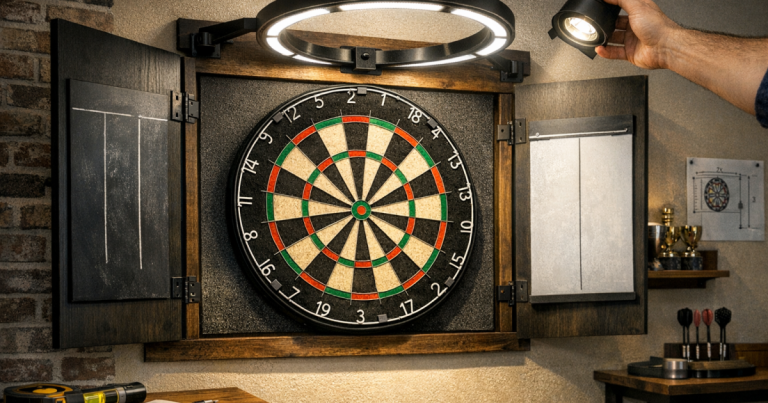
If you use a cabinet, open both doors and check whether they make the wall feel narrower. Cabinet doors can be useful for hiding a scoreboard, but in a tight alcove they may make the setup feel boxed in. Sometimes a simpler surround, side-mounted scoring board or nearby wall panel feels less claustrophobic.
Step 4: Move accessories off surfaces and onto the wall
A small table beside the oche feels convenient until it becomes the place where everything collects: spare flights, shafts, chalk, drinks, cases and broken tips. That surface then creeps into the throwing lane and makes the room feel busier than it really is.
Wall storage works especially well in tight rooms because it keeps useful kit visible without occupying floor space. Keep the items you touch during play close to the board, and move occasional items higher or to one side. Darts, flights, shafts, a sharpener, chalk and a cloth do not need a bulky cabinet or freestanding unit if the wall is planned properly.
If clutter is part of the problem, it is worth setting up a dedicated place for accessories rather than clearing them away after every session. The guide to building a wall storage station for darts gear shows how to keep the playing area tidier without turning the room into a workshop.
Step 5: Check what is above and around your throw
A darts setup can feel cramped even when the floor plan is technically fine. Low ceilings, pendant lights, beams, shelves and sloping roofs can all make players shorten their throw without realising it. This is common in loft rooms, garages, under-stairs spaces and garden rooms.
Stand at the oche with your normal throw and raise your arm slowly through the full motion. You are not just checking whether your hand hits the ceiling; you are checking whether the space makes you hesitate. If a lampshade is close enough to make you cautious, it is affecting your throw even if you never touch it.
Before committing to a board position in a low or awkward room, use a proper clearance check. This walkthrough on checking ceiling clearance before installing a dartboard is particularly useful for rooms where the best-looking wall is not necessarily the most comfortable throwing wall.
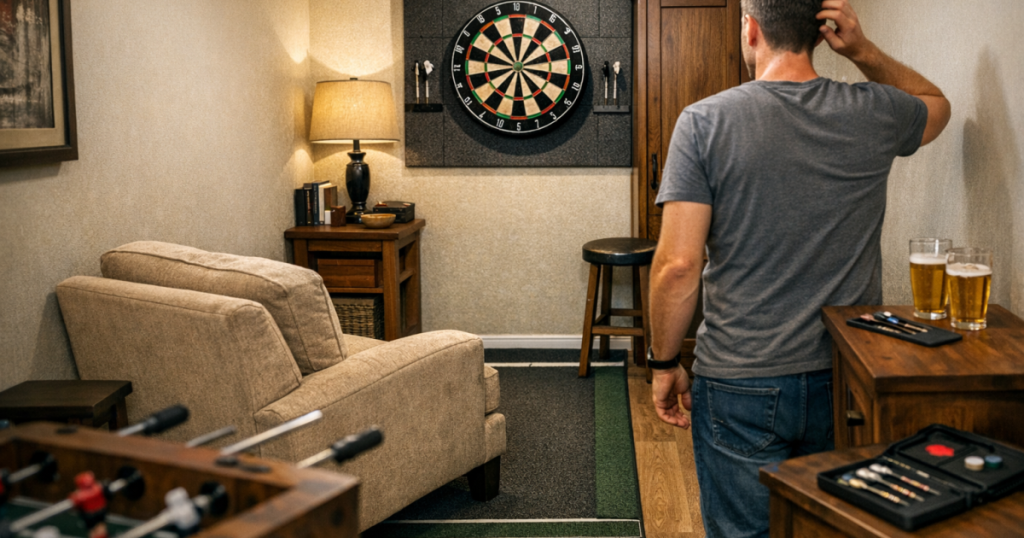
Step 6: Reposition scoring so it does not interrupt the lane
Scoring often causes hidden congestion. If the scoreboard is behind the player, someone has to cross the lane to mark. If it is too close to the board, players may crowd the wall after retrieving darts. If it sits on a table near the oche, it adds visual and physical clutter where the throw should feel calm.
A good scoring position is visible, reachable and out of the throwing path. For many home setups, that means placing it to the side of the board rather than directly beside the player. Left or right does not matter as much as keeping the route consistent: throw, step away, retrieve, score, reset.
If more than one person plays, watch where the non-thrower naturally stands. They should not be hovering behind the thrower, blocking the doorway or standing close to the board while darts are being thrown. A cramped feeling often disappears once spectators and scorers have a proper place to be.
Step 7: Use lighting to open up the board visually
Poor lighting makes a darts area feel smaller because your eyes work harder. Shadows across the trebles, glare from a ceiling light or a dark patch around the board can make the throw feel less settled, even when the physical space is adequate.
The aim is even light across the board face without forcing players to stare into a bright source. In a tight room, avoid placing a freestanding lamp where people step or retrieve darts. Wall-mounted or board-focused lighting can help, provided it does not create glare, cast strong shadows or protrude into the throwing area.
Test lighting at the actual time you usually play. A room that feels fine on a bright afternoon may feel narrow and shadowy in the evening, especially if the main ceiling light sits behind the player and throws arm shadows onto the board.
Step 8: Try a temporary layout before making permanent changes
Before you move brackets, drill new holes or redesign the room, build a temporary version of the improved layout. Use masking tape for the oche, a cardboard shape to represent a cabinet door, and boxes to mimic any storage you plan to add.
Play a short practice routine rather than throwing one or two darts. A setup can feel fine for a single visit to the oche but become irritating over a full leg. Include the whole flow: standing, throwing, stepping aside, retrieving, scoring and letting the next player take position.
Ask three simple questions after the test:
- Can I throw without changing my natural stance?
- Can another player wait safely without crowding me?
- Can I retrieve and score without walking around obstacles?
If the answer to any of those is no, adjust the lane before worrying about decorative details. The most attractive setup is not the best one if every leg feels like a shuffle around furniture.
Room examples that usually need a different fix
Narrow spare bedroom
Keep the bed or desk out of the oche zone if possible, even if that means using a less obvious wall. In a narrow room, the biggest improvement is often moving the board so the throw runs along the length of the room rather than across it.
Garage or utility space
Mark a clear boundary between darts and storage. Bikes, tools, laundry racks and stacked boxes tend to migrate back into the lane, so use wall hooks, shelving and a visible oche line to protect the playing space.
Living room setup
Prioritise quick reset. Choose a wall where furniture can stay in its normal position, or where one chair can be moved without rebuilding the room. If every session requires a major rearrangement, the setup will feel cramped even when the measurements are technically correct.
Alcove or corner board
Check shoulder clearance carefully. Corners can look tidy, but they may force right-handed or left-handed players to alter their arm path. A board slightly away from the corner often feels better than one tucked tightly into it.
Things readers ask
How much space do I really need around the oche?
There is no single official width for a home playing lane, but you need enough room for a relaxed stance, arm movement and a safe step away after throwing. If your foot position is dictated by furniture rather than comfort, the area is too tight.
Can I put a dartboard behind a door?
Only if the door can be kept fully secure during play and does not interrupt the throwing or retrieval route. In most homes, a door swing near the board or oche makes the setup feel awkward and should be avoided.
Why does my setup feel cramped even though the measurements are correct?
The official height and distance only set the board and oche positions. The room can still feel tight because of furniture, lighting, spectators, storage, low ceilings or a poor scoring position.
Is a cabinet a bad idea in a small darts area?
Not always. A cabinet can keep the wall tidy, but open doors can narrow the visual space around the board. Test the setup with the doors open before deciding whether it helps or hinders the room.
In brief
Fixing a tight darts area is mostly about flow. Get the measurements right, protect the throwing lane, move clutter off the floor, check overhead space and make scoring easy without crossing the player’s path. Once the board, oche and retrieval route feel natural, the whole room will feel less cramped without needing a much larger space.