A sloping garage floor, uneven carpet or slightly raised mat can make dartboard height on uneven flooring feel more awkward than it should. The aim is to set the bull at a fair, repeatable height from the playing surface rather than chasing every dip and bump in the room. A careful mark-up before you drill or hang the board saves a lot of fiddling later.
The standard dartboard height is 1.73 m from the floor to the centre of the bull. On an uneven surface, the important part is choosing the correct floor reference point and measuring vertically from it, not measuring from a skirting board, a wonky threshold or the nearest convenient high spot.
The short version
For most home setups, measure 1.73 m vertically from the finished floor surface directly below the centre of the dartboard. Use a plumb line, laser level or spirit level to identify that point accurately, then mark the bull centre on the wall before fitting the bracket or cabinet.
- Use the floor below the board as your main reference: not the middle of the room, not the oche, and not the top of the skirting.
- Measure to the bull centre: not the top of the board, the treble ring or the cabinet hinge line.
- Keep the tape vertical: an angled tape gives a false reading on sloped floors and uneven walls.
- Check the oche separately: uneven floors can distort diagonal checks, so set the throw line with care after the board is hung.
- Confirm after hanging: brackets, cabinets and surrounds can shift the final bull position slightly.
Before committing to the position, it is also worth checking headroom, lights and door swing. If the board is going into a garage, loft room or low-ceilinged corner, use this guide to check ceiling clearance before installing a dartboard so the throwing area feels comfortable rather than cramped.
Why uneven floors cause bad measurements
A normal dartboard measurement assumes a flat, level playing area. Many UK home setups are less tidy than that. Garages often slope gently towards the door, older sheds can settle at one corner, suspended timber floors can crown slightly, and carpet plus underlay can make the tape sink differently depending on where you stand.
The mistake is trying to compensate by eye. If the floor drops away from the wall, you might be tempted to lift the board because the player stands lower at the oche. If the oche is on a thick mat, you might be tempted to lower the board. Both can create a setup that is difficult to reproduce and awkward for anyone else to understand.
The cleanest approach is to establish a local datum: the finished floor surface immediately below the board centre. From there, mark the bull centre at 1.73 m. Once that fixed point is correct, you can deal with the oche, mat and standing position as separate setup decisions.
Tools that make the job easier
You do not need specialist equipment, but a few simple tools make the result much more reliable than holding a tape against the wall and hoping for the best.
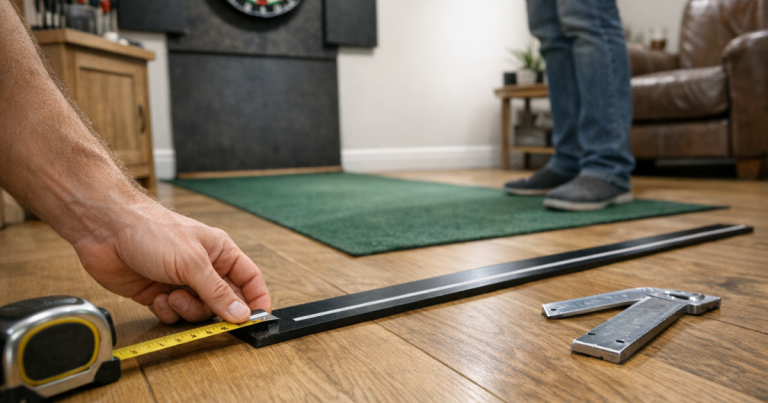
- Tape measure: use one with a clear metric scale and a firm blade that does not collapse over the full height.
- Pencil or fine marker: make a small, precise mark for the bull centre rather than a large smudge.
- Spirit level: useful for checking vertical alignment and cabinet squareness.
- Plumb line: a simple string and weight works well for finding the floor point directly under the bull.
- Laser level: handy if you already have one, especially on uneven walls or in a garage with poor reference lines.
- Straight edge or small board: useful for bridging uneven carpet pile, floorboards or textured concrete under the measurement point.
A second pair of hands helps, particularly if you are marking inside a cabinet or lifting a surround into position. The key is not having more tools; it is using one consistent reference point.
Step 1: Choose the board centreline
Start by deciding where the centre of the board will sit left to right. Do not begin by measuring height. First check that the throwing lane is clear, the board is not too close to a door opening, and there is enough space for the oche distance without forcing players into furniture, a workbench or a garage step.
Mark a light vertical centreline on the wall where the bull will sit. If you are using a cabinet, open both doors and check that they will not hit shelving, light fittings or side walls. A cabinet can make the setup neater, but it also adds width and can change where your mounting holes land.
On plasterboard walls, the board and cabinet need secure fixing, not just a neat height mark. If that is your situation, follow the separate fixing advice in how to fit a dartboard cabinet on plasterboard before you rely on the wall holding regular play.
Step 2: Find the floor point directly below the bull
Once the centreline is chosen, use a plumb line to identify the exact floor point below the future bull centre. Hold the string against the wall on the centreline and let the weight settle. Where the line meets the floor is your measuring point.
This matters because uneven flooring can change noticeably over a short distance. Measuring from a point 20 cm to the left or right might not sound like much, but on a sloping concrete garage floor it can easily alter the reference height enough to make the board feel wrong.
If the floor has deep carpet, lumpy underlay or rough concrete texture, place a small flat board or straight edge at the measuring point. Do not squash soft flooring hard with your foot while measuring, as this can create a lower reference than the board will actually sit above in normal use. Use the finished surface as it naturally lies.
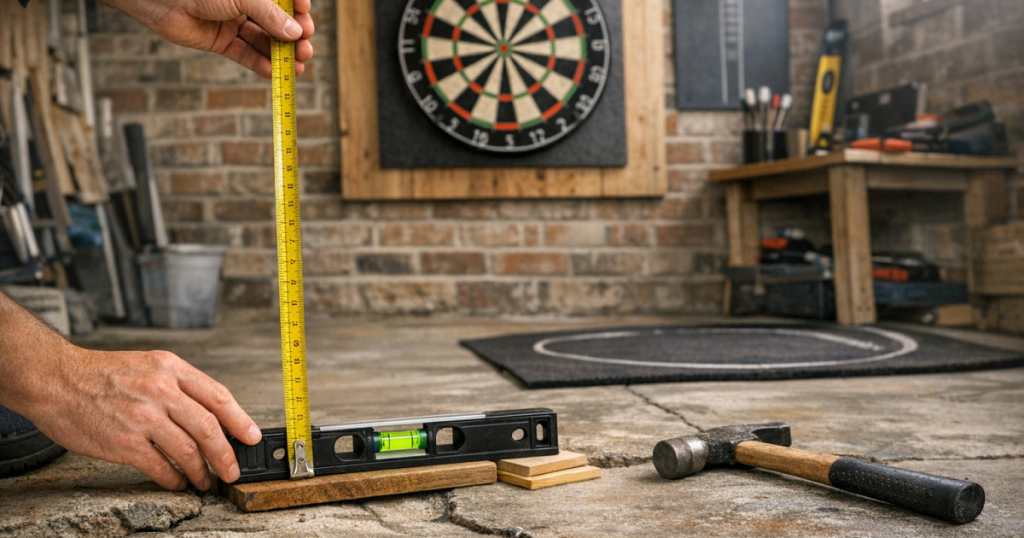
Step 3: Measure 1.73 m vertically
From the floor reference point, measure straight up to 1.73 m and mark that point on the centreline. This is the bull centre. The tape should be vertical, not leaning out into the room or pulled diagonally across the wall.
If the wall leans slightly, the practical home method is still to mark the centre point on the playing face plane as accurately as your setup allows. A laser level can help by projecting a vertical line, while a spirit level can keep your tape or straight edge honest.
Do not measure to the top of the dartboard and work down unless you are absolutely sure of the board dimensions and bracket position. Bristle dartboards are standardised in general playing layout, but cabinets, surrounds and mounting hardware can introduce small differences in where the board finally rests.
Step 4: Fit the bracket, then re-check the bull
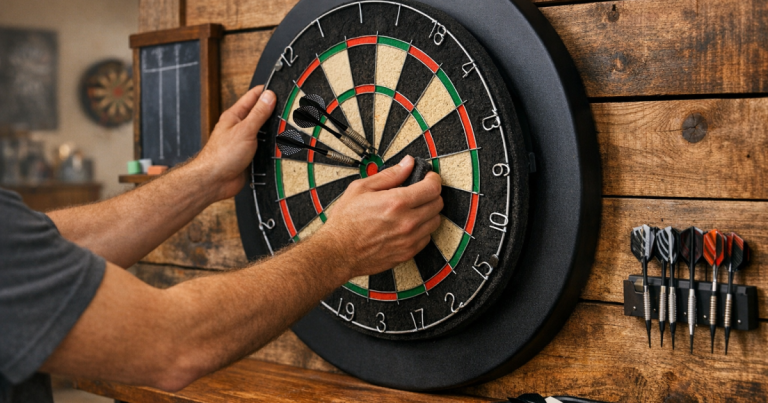
Most home bristle boards hang from a central rear screw into a wall bracket. The wall bracket itself is not always the bull centre mark; the final position depends on the board’s rear fitting and how it settles on the bracket. Use the manufacturer’s fitting instructions for the bracket, but treat your 1.73 m bull mark as the point you must verify after hanging.
Hang the board, then measure again from the same floor reference point to the centre of the bull. If it is slightly out, adjust before adding extras such as a surround, cabinet doors, lighting or a scoreboard. It is much easier to correct a bracket position now than after the whole area is dressed and tidied.
If you use a rotatable bristle board, remember that rotating the board later should not change the bull height. It only changes which numbered segment is at the top once you move the number ring. The centre fixing and bull should stay in the same place.
Step 5: Deal with mats, raised oches and sloping throw lines
The board height and the oche position are related, but they are not the same measurement. After the bull is correctly set, measure the throwing distance from the face of the board to the oche line. On an uneven floor, avoid relying on a diagonal tape from the bull to the oche as your only check, because slope and raised mats can distort the result.
If you use a darts mat, decide whether it is a permanent part of the playing area or just a loose floor protector. A thick mat at the oche will raise the player slightly, but lowering the board to match the mat can make the setup non-standard when the mat is moved. For most homes, the better answer is to keep the bull at the standard height and make the oche surface consistent for every game.
For garages and shared living spaces, a removable oche can be more reliable than a strip of tape that peels or shifts. If you want a toe line that goes down in the same place each time, see how to build a removable darts oche at home.
Common home scenarios
Garage floor sloping towards the door
Set the bull from the floor directly below the board, not from the lower point near the garage door. Once the board is correct, mark the oche using the horizontal playing distance from the board face. If the slope is steep enough to affect balance, consider whether a flatter area, fixed platform or different wall would make play more comfortable.
Thick carpet and underlay
Measure from the natural top of the carpet pile below the board. Do not compress it heavily with the tape end. If the tape hook sinks into the pile, place a thin, flat offcut on the carpet and measure from its top surface, allowing for its thickness if needed.
Old timber floorboards
If one board is cupped or raised, bridge the immediate area with a straight edge so you are not using a single high ridge as the reference. The goal is the practical finished floor level at the board, not the highest splinter or lowest gap.
Board above skirting
Never measure up from the top of the skirting board. Skirting height varies and is not a playing surface. Drop your tape or plumb line to the actual floor surface, then measure from there.
Board inside a cabinet
Mark the bull centre before fixing the cabinet permanently. Cabinets can tempt you to align everything by the outer frame, but the board itself is what matters. After fitting, close and open the doors, check the board sits flat, then re-measure the bull.
Accuracy checks before you call it finished
- Re-measure from the same floor point: changing the floor reference point is the most common reason for conflicting readings.
- Check the bull, not the bracket: the dartboard’s final hanging position is what counts.
- Stand at the oche and look for obvious lean: if the board looks twisted, check the cabinet or bracket level.
- Test with normal lighting: shadows can make a board appear off-centre even when the measurement is right.
- Mark discreet reference points: a tiny pencil mark behind the board or inside the cabinet helps if you remove the setup later.
- Re-check after adding a surround: a tight surround can nudge a board if the bracket is loose or the wall is uneven.
If your home darts area is in a multipurpose room, keep the setup repeatable. A board that is technically correct but awkward to restore after storage will become frustrating quickly. Small reference marks, a fixed cabinet position and a dependable oche line make casual games much easier to start.
Things readers ask
What is the easiest way to check dartboard height on uneven flooring?
Use a plumb line to find the floor point directly under the bull, then measure vertically to 1.73 m. Re-check the bull centre after the board is hanging, because brackets can shift the final position slightly.
Should I measure from where I stand or from the wall?
Measure the board height from the finished floor surface directly below the board. Set the oche distance separately from the face of the board, using a consistent toe line.
Does a thick darts mat change the dartboard height?
Usually, no. Keep the bull at the standard height and treat the mat as part of the standing area. If the mat is permanent and covers the whole playing zone, make sure all measurements are taken from the same finished surface.
Can I use the diagonal bull-to-oche measurement on a sloped floor?
Use it only as a rough sense-check. On a sloped floor, diagonal measurements can be misleading, so set the bull height and oche distance separately.
What if the board looks wrong even when the tape says it is right?
Check the bracket, cabinet level, wall lean and lighting. Visual distortion often comes from a tilted cabinet, uneven surround or shadow rather than the bull height itself.
Main points
Uneven flooring does not need a special dartboard height; it needs a consistent measuring method. Choose the centreline, find the floor point directly below the bull, measure vertically to 1.73 m, then verify the bull after the board is hung.
Keep the oche measurement separate, avoid using skirting boards or diagonal checks as your main reference, and make the setup repeatable if the room is shared with bikes, storage, furniture or family life. A few careful marks at the start will give you a board that feels fair every time you step up to throw.