Rental walls and steel-tip darts are not a relaxed combination: one lively treble attempt can leave a neat crescent of pin holes in paintwork. A removable dartboard backboard gives you a wider missed-dart zone without committing to a permanent surround, provided it is stable, non-marking and easy to lift away. The trick is to separate wall protection from wall damage: use a light, layered panel, non-marking contact points and a mounting method that does not rely on adhesive alone to hold a heavy board.
What to know first
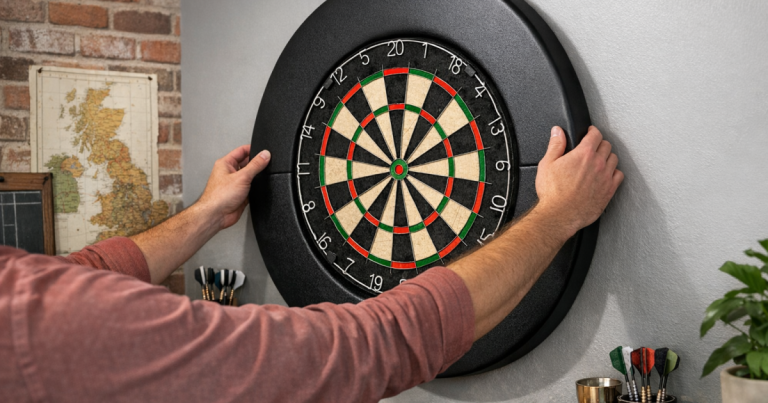
The most rental-friendly approach is usually a freestanding or lightly supported backboard, not a panel glued straight to the wall. Adhesive strips can help stop a light panel from rattling, but they should not be trusted as the main support for a bristle dartboard or a heavy sheet of MDF.
- Use the backboard to catch missed darts, not to hide an unsafe dartboard mount.
- Keep all contact points soft: felt pads, rubber feet or removable picture-hanging strips used within their stated limits.
- Choose a panel size that suits the players in your home, not just the diameter of the dartboard.
- Check your tenancy agreement before making holes, even small ones.
- Test the finished setup with gentle throws before normal play.
Step 1: Decide what the backboard has to protect
Start by looking at your actual miss pattern. If you play regularly, the risky area is usually a wide halo around the doubles and above the board, where pulled or over-thrown darts tend to land. If friends, children or newer players use the setup, allow more space below and to the sides.
For a tidy home setup, a square or rectangular panel is usually easier to build than an elaborate shape. Around 900 mm by 900 mm is a useful compact starting point for confident throwers, while something closer to 1000 mm wide by 1200 mm high gives a more forgiving area for shared spaces. Bigger is not automatically better in a rental, because extra size adds weight and makes the panel harder to move without scuffing walls.
Before cutting anything, confirm the playing position. The centre of the bull should sit at the correct height and the throw line should be measured from the face of the board, not from the skirting board. If your layout needs a reset, use this guide to measure dartboard height and throwing distance correctly before you build the panel around the wrong position.
Step 2: Choose a rental-safe backboard style
There are three sensible ways to make the backboard removable. The right one depends on whether you are allowed to fix the dartboard to the wall and how much floor space you have.
Freestanding panel
This is the safest option for strict rentals because the backboard carries its own weight. The panel stands on low feet, with the dartboard mounted to the panel rather than directly to the wall. Add a rear prop or wide base so the panel cannot rock when darts hit the board. It takes more floor space, but it avoids relying on paint, plaster or adhesive.
Panel behind an approved wall-mounted board
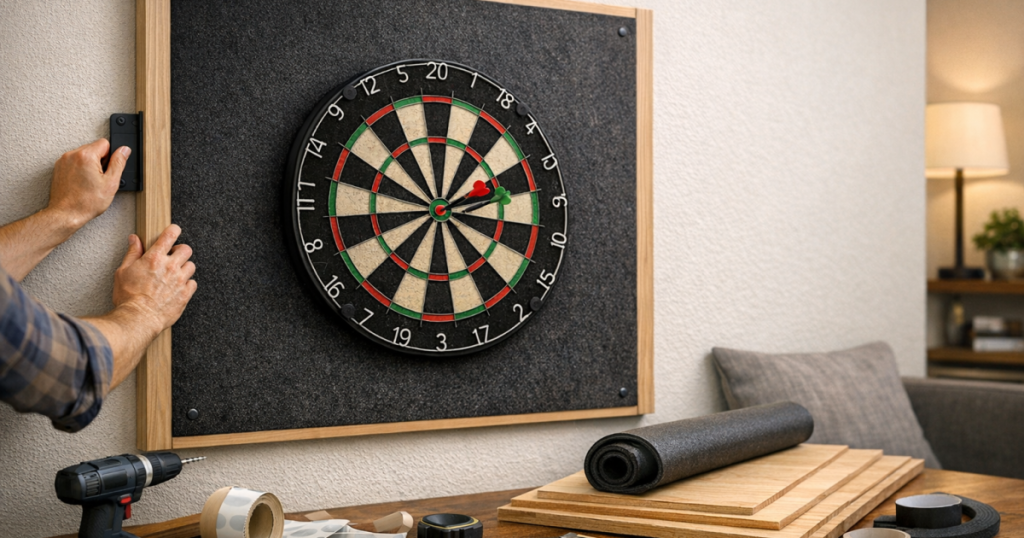
If your landlord has approved a dartboard fixing, you can build a removable panel that sits behind the board and is held in place by the existing board mount or by light stabilising strips at the edges. This keeps the playing feel close to a normal wall setup. The wall fixing still needs to be secure enough for the dartboard itself.
Lightweight protective surround
For occasional play, a light surround made from cork, felt-covered board or foam-backed board can reduce small marks around the board. This is not as robust as a proper panel, and thin cork alone may not stop a hard-thrown steel tip from reaching the wall. Treat it as light protection rather than a full missed-dart shield.
Step 3: Pick materials that stop darts without becoming awkward
A good rental backboard uses layers. The front layer slows and grips the dart; the backing layer stops the point reaching the wall; the rear contact layer prevents scuffs.
- Backing sheet: thin plywood, hardboard or MDF can work. Plywood and hardboard are often easier to keep light; MDF can be neat but becomes heavy quickly as the panel gets larger.
- Front layer: cork tiles, dense felt, carpet tile, rubber sheet or EVA foam can all be used. Avoid very springy material that may encourage bounce-outs.
- Rear protection: felt pads, rubber bumpers or soft foam strips keep the board from rubbing against paintwork.
- Edges: timber trim or fabric tape can make the panel look more finished and reduce chipped corners when moving it.
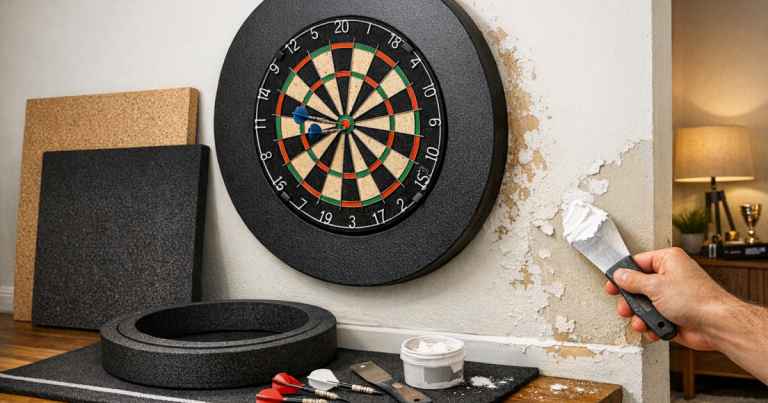
If you use removable strips such as Command Large Picture Hanging Strips, use them only for light stabilising or for a small protective surround, and follow the packaging instructions on weight limits, surface preparation and removal. Painted rental walls vary a lot, so test on a hidden area and avoid using adhesive on flaky, freshly painted or damp surfaces.
Step 4: Build the panel in a way that is easy to remove
Lay the backing sheet flat on a clean surface. Mark the centre line and the bull position before attaching the front layer; this helps you keep the dartboard centred later. If you are using tiles or strips on the front, dry-fit them first so there are no awkward gaps around the board.
Attach the front layer with a suitable adhesive for the materials, keeping the coat even and avoiding thick lumps that create raised areas. If you are using screws or staples to hold trim, keep metal fixings well away from the scoring area. A dart hitting a hidden fixing can blunt or deflect unpredictably.
For a freestanding version, add two feet at the bottom of the panel. The feet should project far enough forward and back to resist tipping, without crossing into the thrower’s standing area. Fit rubber pads underneath so the panel does not mark laminate, vinyl or carpet. If the panel is tall, add a rear support leg or brace rather than relying on the wall behind it.
For a wall-adjacent version, add soft pads on the rear corners and along any point that may touch the wall. The aim is gentle contact, not pressure. The panel should lift away cleanly when you want the room back to normal.
Step 5: Mount the dartboard without trusting the wrong surface
A bristle dartboard is too heavy and too impact-prone to hang from ordinary adhesive strips. Use a proper dartboard bracket fixed to a solid panel, a dedicated stand, or an approved wall fixing. If your backboard is freestanding, mount the board to the backboard itself and make sure the whole structure stays upright when darts land.
Check the bull height after the board is fitted, not just after you mark the empty panel. The thickness of feet, floor protectors or a mat can shift the final position slightly. If you use a darts mat, make sure it does not push the throw line into a doorway or narrow route through the room.
Room layout matters as much as wall protection. A removable panel still needs a clear throw line, safe retrieval space and no traffic crossing between the player and the board. If the setup is in a lounge, hallway or spare room, it is worth checking how to plan a darts corner without blocking walkways before you settle on the final position.
Step 6: Test for marks, wobble and bounce-outs
Do a short test before inviting everyone round for legs of 501. Start with gentle throws into different parts of the board and then check the panel. It should not rock, scrape the wall, slide on the floor or make the dartboard feel loose.
- Look behind the panel after testing to check for rubbing or pressure marks.
- Check the front layer for darts passing through too easily.
- Listen for rattling, which usually means the panel needs extra soft pads or a more stable base.
- Watch for bounce-outs from hard front materials or hidden fixings.
- Confirm that the board can rotate normally for wear without the backboard blocking access.
If darts are still reaching the paintwork, do not just add another thin decorative layer and hope for the best. Increase the protected area, add a stronger backing sheet, or move the setup to a safer wall. For extra prevention around awkward corners and tight rooms, the advice on how to stop darts marking painted walls around the board pairs well with a removable build.
Step 7: Make it look intentional, not temporary
A rental-friendly setup does not have to look like a garage offcut. Covering the front layer with dark felt, neutral fabric or neat cork can help the backboard blend into a living room or spare bedroom. Keep patterns simple: busy prints can make darts harder to spot and can distract around the doubles.
If the backboard is moved regularly, add a small handhold at the side or leave a safe grip gap behind the trim. Do not make the panel so large that it bangs into door frames every time you store it. A removable dartboard backboard works best when it is genuinely convenient to lift away, not when it becomes a bulky item nobody wants to move.
Storage matters too. Slide the panel behind a wardrobe, under a bed if it is small enough, or flat against a utility room wall. Avoid leaning it front-face out in a busy area where the dartboard bracket or trim could catch clothing or furniture.
Common mistakes to avoid
- Using adhesive as the main dartboard support: it can fail under weight and repeated impact.
- Making the panel too thin: a decorative cork sheet may not protect plaster from harder misses.
- Forgetting skirting boards: they can push the panel forward at the bottom and make it lean awkwardly.
- Building too close to a corner: side misses can still reach the adjacent wall.
- Skipping the removal test: some tapes and pads behave differently on matt paint, silk paint and older plaster.
- Ignoring noise: a loose panel can drum against the wall, which is not ideal in flats or shared houses.
Helpful questions
Can I use adhesive strips to hang the whole backboard?
Only for very light protection, and only within the strip maker’s stated limits. Do not use ordinary adhesive strips as the main support for a bristle dartboard or a heavy timber panel.
Will cork tiles alone protect a rental wall?
Thin cork tiles may reduce light surface marks, but they are not always enough for steel-tip misses. A firmer backing layer behind the cork gives much better protection.
What size should I make the backboard for beginners?
For newer players, go wider and taller than a standard close surround. A panel around 1000 mm wide by 1200 mm high is often more forgiving without becoming impossible to store.
How do I stop the panel marking the wall when it moves?
Use soft rear pads, keep the panel stable, and check behind it after the first few sessions. Wobble and pressure are the usual causes of rental wall marks.
Can I take the backboard down after every session?
Yes, if you keep it light enough and avoid fiddly fixings. Freestanding panels and lift-off designs are much easier to live with than anything that needs tools each time.
What stands out
The best rental setup is not the heaviest backboard or the most permanent-looking one. It is the one that protects the missed-dart zone, keeps the dartboard secure, avoids unnecessary holes and can be removed without leaving a story on the wall. Build it light, test it slowly, and make every contact point non-marking before regular play.