The easiest way to fit a dartboard surround without marking the wall is to let the surround grip the board, not the paintwork. A good setup should protect the area around the treble ring, sit flat, and come away cleanly when you need to rotate the board or redecorate.
Most wall damage comes from rushing the fit: pushing the surround against dusty paint, trapping it behind an uneven board, using unnecessary adhesive, or leaving gaps where stray darts still reach the wall.
The short version
- Use a surround that fits snugly around a standard bristle dartboard and does not need glue, screws or tape on the wall.
- Check the board is mounted flat before adding the surround, because the surround can only sit as evenly as the board does.
- Clean the nearby wall lightly, but do not stick anything to fragile, fresh or flaking paint.
- Fit the surround by removing the number ring if needed, pressing the surround around the board, then checking for gaps.
- Leave enough clearance for doors, walkways, cabinets and lighting so the protection does not create a new nuisance.
Step 1: Check the board position before adding protection
Start with the dartboard itself. If the board is too high, too low, tilted, or sitting proud from the wall on one side, the surround will look wrong and may leave exposed patches around the edge.
For a standard steel-tip setup, the bullseye should be 1.73 m from the floor, with the throwing line 2.37 m from the face of the board. If you want to double-check your setup before fitting anything around it, use this guide to measure dartboard height and throwing distance correctly.
Also check the bracket. A loose wall bracket or a board that wobbles when darts land will make the surround shift over time. Tighten the board fixing if needed, rotate the board into its normal playing position, and make sure the number ring is not bent or sitting unevenly.
Step 2: Pick a no-adhesive surround method
For most home setups, the safest wall-friendly method is a push-fit foam or rubber surround that grips the outside of the dartboard. It should be held in place by the board’s outer edge, not by adhesive on the painted wall.
Avoid sticking foam tiles, tape, pads or poster strips directly to paint unless you are happy to accept the risk of residue, lifting or uneven fading. Even products described as removable can behave differently on matt emulsion, old plaster, textured walls, lining paper or recently painted surfaces.
If your wall is delicate, rented, newly decorated or slightly uneven, a surround alone may not be the whole answer. A freestanding or removable backing panel can take the impact instead, while the surround covers the immediate missed-dart zone around the board.
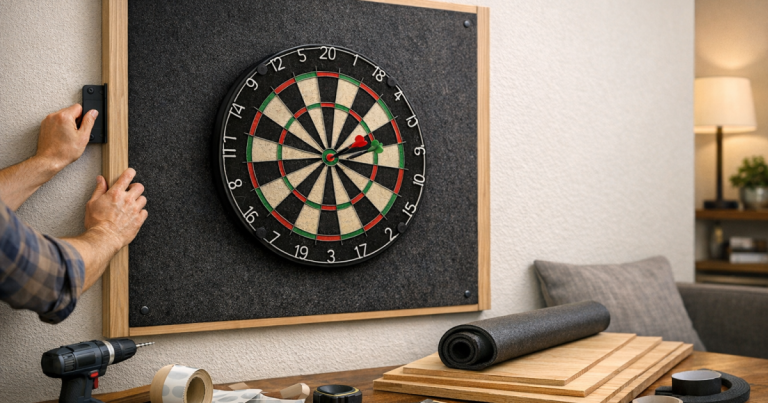
Step 3: Dry-fit the surround before you press it home
Lay the surround flat for a few minutes if it has been stored tightly or arrived slightly compressed. You do not need to force it into shape, but letting it relax helps the sections meet more neatly.
Before fitting, check whether your surround is a one-piece ring or a segmented design. A one-piece surround usually slips over the board from the front. A segmented surround is built around the board in sections, which can be easier in tight spaces or where the board is inside a shallow recess.
If the number ring gets in the way, remove it gently and put it somewhere safe. Do not bend the wire ring or force the surround over raised metalwork. The aim is a clean fit around the board’s outer edge, with the front face of the surround sitting level rather than curling away from the wall.
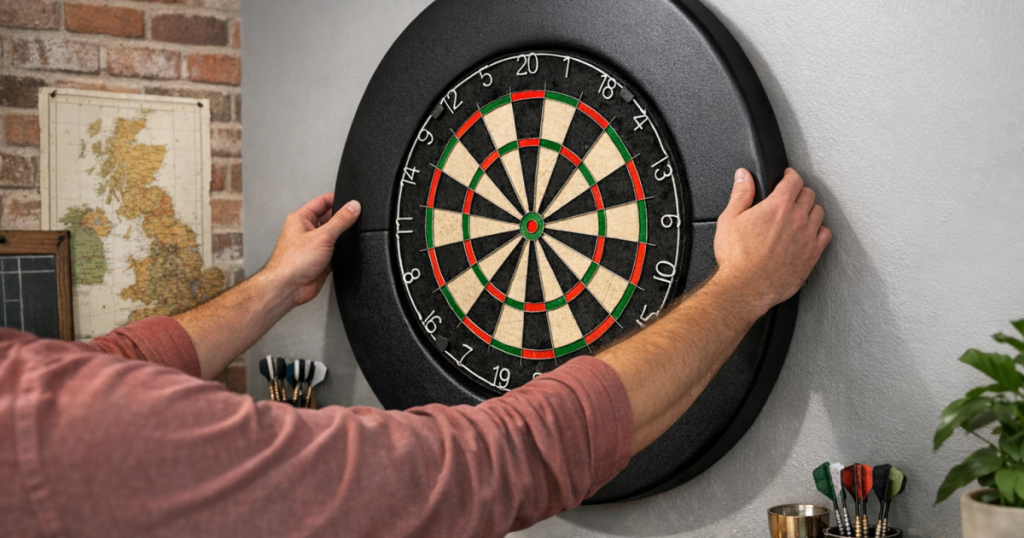
Step 4: Fit it without scuffing the paint
Stand directly in front of the board and line the surround up evenly. If it is a one-piece ring, hold it with both hands and guide it over the front of the board. Press gradually around the circumference rather than shoving one side hard into place.
For a segmented surround, start at the top and work round in order. Bring each section together neatly so there are no obvious seams wide enough for a dart point to reach the wall. Keep your fingers between the surround and the wall where possible, so you can feel whether it is dragging across the paint.
Do not use washing-up liquid, spray polish or lubricant to make the surround slide on. These can mark the board, soften finishes, or transfer residue to the wall. If the fit is extremely tight, remove the surround and check that you have the right size for the board rather than forcing it.
Step 5: Check the protection area from real throwing angles
A surround looks reassuring from straight on, but misses rarely arrive perfectly square. Stand at the oche and look at the wall area around the board from your normal throwing position. Pay particular attention to the upper left and upper right zones if newer players use the setup, as these are common miss areas.
Throw a few gentle practice darts only once the surround is secure. You are not testing how hard it can take a hit; you are checking whether the board moves, whether the surround creeps forward, and whether any edge gaps appear after impact.
If the wall is still visible close to the scoring area, do not rely on careful throwing to solve it. Add a wider backboard, reposition the setup, or use a cabinet-style solution instead of accepting a narrow protected zone.
When a surround is not enough
A surround is excellent for catching near misses, but it is not a complete wall shield. If children, beginners, guests or soft-tipped practice darts are part of the setup, the missed-dart area can be much wider than a standard ring covers.
In a living room or dining space, a cabinet can hide the board and add side protection when open, while a surround gives a cleaner, more club-style look. If you are weighing up the two approaches, the comparison of dart cabinets and surrounds explains where each one makes more sense.
For a garage, utility room or spare room, a removable backboard can protect a larger rectangle of wall without changing the room permanently. This is often the better route where the board is used by mixed-ability players or where the wall finish is difficult to touch up neatly.
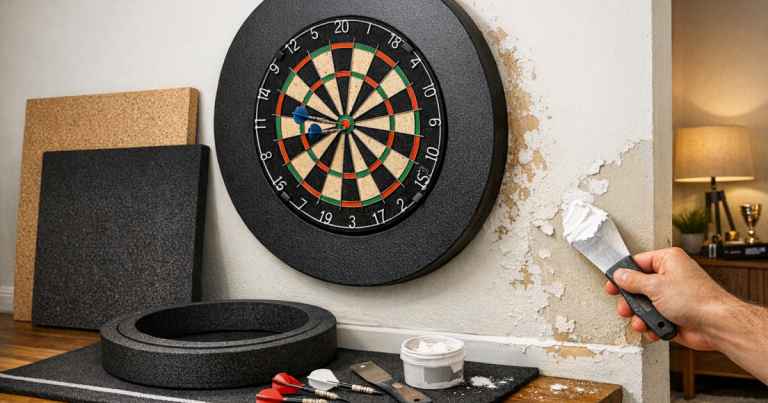
Small checks that prevent marks later
Look for rubbing points
After fitting, slide a thin piece of paper between the surround and the wall where possible. If it is clamped tightly against the paint, it may rub when darts hit the board. A tiny gap is often better than firm pressure against the wall.
Keep the surround clean
Dust and grit on the rear face can act like sandpaper. When you remove the surround to rotate the board, wipe the back lightly with a dry microfibre cloth before refitting it.
Rotate the board carefully
Regular board rotation helps wear, but it is also when wall scuffs happen. Remove the surround first, rotate the board, replace the number ring, then refit the surround. Trying to twist the board while the surround is still wedged in place can scrape paint or distort the surround.
Watch nearby furniture and doors
A surround adds width to the dartboard area. Check that nearby cupboard doors, room doors, shelves and picture frames do not knock it. Repeated knocks can loosen the fit and leave the wall exposed.
Rental-friendly approach
If you are in a rented home, assume the wall finish matters as much as the dartboard setup. Avoid adhesive foam directly on paint, avoid permanent fixings beyond what has already been agreed, and keep all protection removable where possible.
A neat option is to mount the board to a removable panel or backboard, then add the surround to the board as normal. That way, missed darts hit the surround or the panel rather than the landlord’s wall finish. For a more detailed approach, see how to build a removable dartboard backboard for rental walls.
Take a quick photo of the area before setting up, especially if the room already has small marks. It makes it easier to track what has changed and encourages you to keep the surround and backing in good condition.
Common questions
Can I fit a surround without removing the dartboard?
Usually, yes. Most push-fit surrounds go over the front of the board while it remains on the wall. You may need to remove the number ring first so the surround sits cleanly.
Should the surround touch the wall?
It can sit close to the wall, but it should not be jammed hard against painted surfaces. A surround that grips the board while lightly clearing the wall is less likely to rub or leave pressure marks.
Do I need tape to keep a dartboard surround in place?
Not for a correctly sized surround on a standard bristle board. If it keeps falling away, check the board size, the surround fit and whether the board is mounted flat before adding tape.
Will a surround stop all wall marks?
No. It protects the area immediately around the dartboard. Wider misses can still hit the wall, so beginners or shared family setups may need a larger backing panel as well.
Can I use a surround with a dart cabinet?
Sometimes, but space is the deciding factor. Shallow cabinets may not close with a surround fitted, and open cabinet doors can clash with wider surround edges.
Main points
To fit dartboard surround protection cleanly, avoid sticking anything to the wall unless you are prepared for possible paint damage. Let the surround grip the board, keep the wall surface clean, check the fit after a few throws, and remove the surround before rotating the board.
If the protected area still feels too narrow, treat the surround as one part of the setup rather than the whole solution. A wider backboard, cabinet or better-planned darts corner will do more to keep the room looking tidy over time.