A tidy scoring setup makes a home board feel calmer, safer and easier to use. Loose dartboard scorer cables are the bit that usually spoils it: they dangle behind the surround, cross the oche, or get pulled when someone reaches for darts. The aim is simple: keep every lead visible enough to inspect, but tucked away enough that it never interferes with throwing.
Any new mains socket, spur or fixed electrical cabling for a darts area should be carried out by a qualified electrician to ensure compliance with UK electrical safety standards and local building requirements.
At a glance
- Route scorer leads down one side of the board, not across the playing face or throw line.
- Keep power adapters accessible rather than buried behind cabinets or heavy furniture.
- Use removable clips for rented rooms and trunking for more permanent setups.
- Leave a small service loop near the scorer so it can be moved, cleaned or unplugged without tugging the cable.
- Check the route after adding lighting, a surround, cabinet doors or a darts mat.
Step 1: Decide where the scorer actually belongs
Cable tidying is much easier once the scorer position is settled. A wall-mounted scorer usually works best just outside the board surround, at a height where the display is easy to read without standing in the throw path. For most home rooms, that means placing it to the left or right of the board rather than below it, where cables can trail towards the floor and the oche.
If you use a small electronic scorer, keep it close enough to the board that players can update scores naturally, but far enough away that missed darts, cabinet doors or a rotating number ring do not catch the casing or lead. If you are still refining the scoring side of the setup, it is worth checking your match workflow alongside the basics of scoring 501 on a darts scoreboard, because where people stand and tap in scores affects where cables get pulled.
Step 2: Map the neatest cable route before sticking anything down
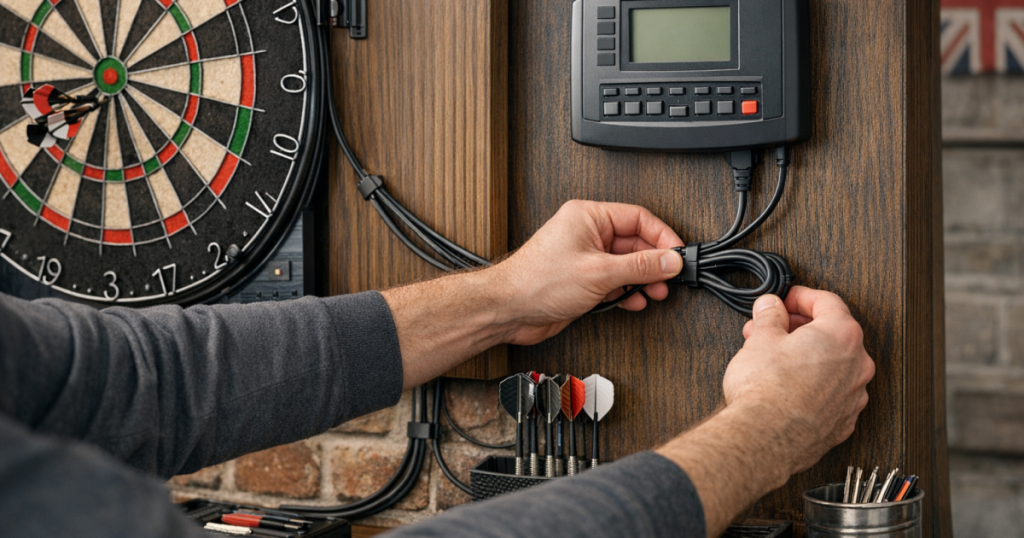
Before fitting clips, tape or trunking, plug the scorer in and loosely hold the cable along the wall. You are looking for the route with the fewest bends, the least visual clutter and no contact with moving or impact-prone parts of the setup.
- Best route: from the scorer, straight down the side of the board area, then along the skirting or behind a cabinet edge to the socket.
- Acceptable route: behind a surround or cabinet, provided the cable is not pinched and can still be inspected.
- Poor route: diagonally across the wall, across the floor in front of the oche, or behind the board where it could be pierced or trapped.
Try to keep the cable on the same side as the nearest socket. Crossing behind the dartboard can look neat at first, but it often creates awkward tension when you rotate a bristle board, fit a surround, open cabinet doors or add lighting later.
Step 3: Separate scorer leads from lighting leads
Many home setups have more than one cable near the board: one for the scorer, one for lighting, and sometimes another for a nearby display or speaker. Bundle everything together only if the route remains tidy, accessible and free from strain. In a darts area, a thinner dedicated run for the scorer is often neater than a thick mixed bundle running down the wall.
Lighting can also change the cable plan. A light ring or overhead fixture may need its own route so the scorer lead does not sag into the visual field or cast an untidy line around the board. If shadows, glare or cable placement are being solved together, use the guidance on lighting a dartboard without shadows or glare before fixing the cable route permanently.
Step 4: Choose the right fixing method for the room
The fixing should suit the room as much as the cable. A garage wall, spare bedroom, rented flat and garden room all need slightly different treatment.
For a shared or temporary room
Use removable adhesive cable clips, light-duty cable ties around existing furniture, or a cable sleeve that can be lifted away when the board is not in use. Avoid anything that damages paint or wallpaper if the room has to return to normal between games. If your board folds away or shares space with other activities, the cable route should be part of the whole pack-away routine; the ideas in creating a foldaway darts area in a shared room are a useful next step.
For a permanent darts corner
Surface trunking gives the cleanest look when a scorer is always in place. Run it vertically beside the board area, then horizontally along the skirting if needed. Keep the trunking straight, avoid sharp changes of direction, and leave access to plugs and adapters. A small length of flexible sleeve can help where the lead leaves the scorer and enters the fixed route.
For a cabinet setup
A cabinet can hide a short section of lead, but it should not crush it. Open and close both doors while the scorer is plugged in and check that the cable does not rub against hinges. If the scorer is mounted inside a cabinet door, leave slack for the full swing of the door, then secure the remaining lead along the inside edge.
Step 5: Keep the floor route clear of the oche
Floor cables are the biggest nuisance in a home darts area. Even if they are not directly on the throw line, they can catch shoes, move a darts mat, or get dragged when someone steps back after throwing. If a cable has to reach a socket across the floor, route it around the edge of the room rather than across the playing space.
Where a short exposed section cannot be avoided, use a low-profile cable cover and position it well away from the oche. Do not run leads under a loose mat where they can create a ridge or become hard to inspect. A neat wall route is nearly always better than hiding the problem under the floor covering.
Step 6: Add a small service loop
A perfectly taut cable looks neat for about five minutes, then becomes annoying. Leave a small loop near the scorer or behind the cabinet so the unit can be removed, cleaned or repositioned without pulling on the connector. The loop should be controlled with a clip or tie, not hanging loose.
This also helps if you rotate a bristle board, remove a surround, repaint the wall or swap accessories. The goal is not to make the cable invisible at all costs; it is to make it organised, protected and easy to manage when the setup changes.
Step 7: Check for snags, strain and heat
Once the route is fixed, do a quick practical test rather than judging it by looks alone.
- Stand at the oche and check that no cable draws your eye or hangs in the board area.
- Throw a few practice darts and watch for vibration or movement in the scorer lead.
- Open cabinet doors fully and confirm the cable does not tighten, pinch or scrape.
- Unplug the scorer and plug it back in without pulling clips away from the wall.
- Check that adapters and plugs have ventilation and are not wedged behind soft furnishings.
- Look for damaged insulation, loose connectors or crushed sections before regular use.
If anything moves, rubs or feels under tension, change the route now. Cable tidying is much easier before the clips have gathered dust and become part of the room.
Neat setups that work in real homes
In a spare bedroom, the tidiest route is often a scorer mounted to one side of the surround, with the lead running vertically down behind a narrow strip of white trunking. In a garage, black clips along a timber batten can look neater than trying to hide the cable on rough brick. In a living room, removable clips behind a cabinet edge usually blend in better than visible trunking, provided the lead is not trapped by furniture.
For a foldaway setup, keep the cable as a managed accessory rather than a permanent mess. Coil the spare length with a soft tie, store the adapter in the same box as the scorer, and mark which end plugs into the unit if the connectors are similar. Small habits like this make the darts area faster to set up and less likely to develop a tangle of leads over time.
FAQ
Can I tape scorer cables to the wall?
You can use tape as a short-term test, but it is not a tidy long-term fixing. It can lift paint, collect dust and loosen with temperature changes. Clips, sleeves or trunking usually give a cleaner and more reliable result.
Should the cable run behind the dartboard?
Avoid running cables directly behind the board if possible. Board rotation, fixing screws and impact vibration can all make that area awkward. A side route is easier to inspect and less likely to interfere with maintenance.
What is the neatest option for a rented room?
Removable adhesive clips and reusable cable ties are usually the safest starting point. Test any adhesive in a discreet spot first, and choose a route that can be removed without leaving obvious marks.
How do I stop spare cable hanging below the scorer?
Make a small, loose coil and secure it with a hook-and-loop tie near the scorer or inside the cabinet. Do not pull the lead tight, and do not wrap it sharply around the power adapter.
Can scorer and lighting cables share the same trunking?
They can share a route if there is enough space and neither cable is strained or pinched. Keep plugs and adapters accessible, and avoid overfilling trunking just to make the wall look cleaner.
In brief
The neatest cable route is usually the simplest one: scorer to side wall, side wall to skirting, skirting to socket. Keep cables out of the throw area, avoid crushing them behind cabinets, and leave enough slack for normal use. A tidy scoring setup is not just about appearance; it makes the whole darts area feel more organised, safer underfoot and easier to keep game-ready.