Renting, sharing a wall, or simply not wanting holes in your plaster should not stop you building a decent darts area. A freestanding dartboard gives you a proper home throwing area without putting screws into a wall, as long as you control height, distance, stability and the space around the board. The aim is not just to get the board upright; it is to make the whole setup feel repeatable, safe for the room, and comfortable enough for regular practice.
The short version
- Use a purpose-made dartboard stand rather than balancing a board on furniture or a temporary hook.
- Set the bullseye centre at 1.73 m from the floor for standard steel-tip play.
- Measure the throwing distance from the board face, not from the stand legs or the wall behind it.
- Stabilise the stand, protect the floor and walls, and leave enough side clearance for missed darts.
- Test the layout before committing to a room position, especially in narrow lounges, garages or spare bedrooms.
Step 1: Choose a stand that suits the room
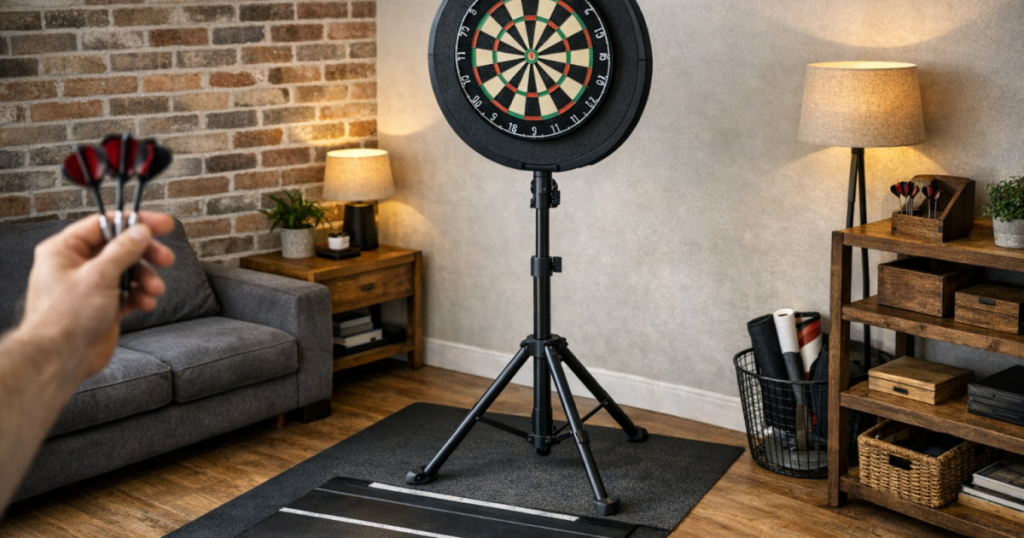
A no-drill setup starts with the stand. Purpose-made dartboard stands are designed to hold the board at playing height and keep it clear of the wall. Examples include the Winmau Xtreme Dartboard Stand and the Unicorn Dartmate Tri-Stand, but the exact choice matters less than whether the stand is stable, compatible with your board, and suitable for the space you have.
Before setting anything up, check how the board attaches. Some stands use a mounting bracket, some require a centre screw in the back of the board, and some work better with a separate backboard or surround. That is still very different from drilling into a wall, but you should follow the stand and board instructions so the board sits flat and does not twist during play.
Think about the footprint too. Tripod-style stands need floor space behind and beside the board, so they are not always ideal in a tight hallway. A lounge corner, garage, garden room or spare bedroom usually works better because you can leave the throwing lane clear without constantly moving furniture.
Step 2: Find a sensible throwing lane
Do not start by assembling everything in the first open spot you see. Stand where the oche will be and look forwards. You need a clear throwing lane, enough headroom, and a safe area beyond the board for bounce-outs and missed darts. Avoid positions where people naturally walk across the line of throw, such as between a sofa and a kitchen, or near a doorway.
If you are testing several positions, use masking tape or small removable markers on the floor. It is worth following the same logic you would use to test a darts layout before drilling, even though you are avoiding wall fixings altogether. The test should answer three questions: can you throw comfortably, can other people move around safely, and can the room tolerate the occasional stray dart?
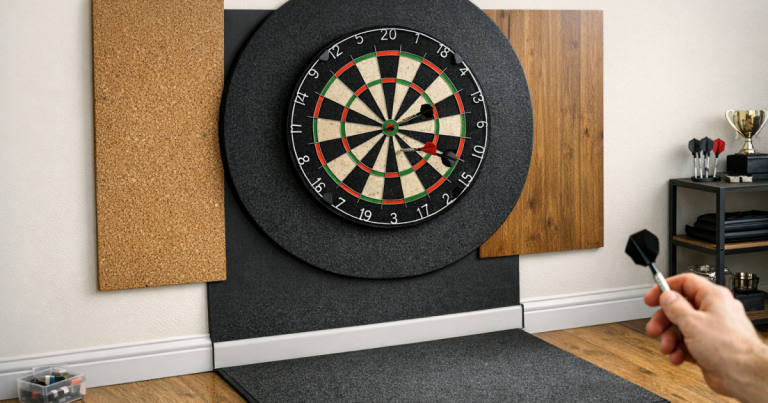
For steel-tip darts, allow for damage risk behind and around the board. A freestanding dartboard may not touch the wall, but a missed dart can still hit skirting, plaster, furniture or flooring. A surround, loose backboard, protective mat and sensible furniture placement make the setup much more forgiving.
Step 3: Set the dartboard height accurately
For standard steel-tip darts, the bullseye centre should be 1.73 m from the floor. With a stand, this is usually adjusted by raising or lowering the centre pole, mounting bracket or board position. Use a tape measure from the floor directly below the board up to the centre of the bull, not to the top of the board.
Check the height after the board is fully attached, not before. The weight of the board and bracket can slightly change how the stand sits, particularly on carpet or uneven flooring. If the stand has adjustable legs, make sure it is level before you fine-tune the bull height.
For soft-tip or electronic boards, do not assume the same measurements apply in every situation. Many home soft-tip layouts use a different throwing distance, and electronic boards may have their own mounting guidance. If you are switching between steel-tip and soft-tip, keep a note of the setup you use so you are not guessing each time.
Step 4: Measure the oche from the board face
The oche distance for standard steel-tip play is 2.37 m from the face of the dartboard to the front of the toe line. This detail catches people out with stands because the board is often forward of the wall and the tripod legs sit behind or around it. Measure from the playing surface of the board, not from the wall, stand pole, rear leg or cabinet position.
The simplest method is to hold the tape measure at the board face in line with the bull and run it straight along the floor to the throw line. If the stand blocks the tape, measure carefully from a point directly below the board face. For a more robust method, use the diagonal measurement from the bull to the oche, then check against your straight floor measurement.
If you want a repeatable home setup, mark the oche with low-tack tape, a removable floor marker or a darts mat. A mat is useful because it protects flooring and gives your front foot a consistent stopping point. For exact measurement methods, the walkthrough on how to mark dartboard height and oche distance accurately is the best next step.
Step 5: Stabilise the stand before throwing properly
Once the height and distance are correct, check the stand like you would check a wobbly table before putting a drink on it. Light movement is normal on many portable stands, but the board should not sway so much that doubles and trebles become inconsistent. Push gently on the board from each side and watch how quickly it settles.
If the stand moves too much, try these checks:
- Spread the legs fully and lock them in the position recommended by the manufacturer.
- Place the stand on a firm, level surface rather than a thick rug or soft carpet if possible.
- Use a non-slip mat under the feet if the floor is smooth laminate, tile or polished wood.
- Keep the centre pole vertical so the board does not lean towards or away from you.
- Move the stand slightly away from skirting boards, curtains or furniture that could interfere with the legs.
Some players add weight to the base area, but do this carefully. Do not hang heavy items from the board or bracket unless the stand is designed for it. If you use a weighted bag near the lower frame, make sure it cannot slide into your throwing line or create a trip hazard.
Step 6: Protect the room around the board
A stand solves the wall-fixing problem, but it does not remove the need for room protection. Steel-tip darts can bounce out, glance off wires or miss the scoring area completely, particularly during casual play. If the board is in a lounge or rented room, protect the likely impact zones before you invite anyone else to throw.
A dartboard surround is the easiest starting point for near misses. For wider protection, place a removable backing panel behind the stand. This can lean against the wall, sit on a stable support, or be integrated with the stand if your setup allows it. The backing should be large enough to cover the common miss area around the board, not just a narrow strip directly behind the trebles.
Floor protection matters too. Darts mats help mark the throw line and reduce damage from bounce-outs. On hard floors, a mat also makes the area feel more like a dedicated oche instead of a temporary corner of the room. If the stand is on carpet, check that the feet do not sink unevenly and change the board height over time.
Step 7: Sort lighting and sight lines
Freestanding setups can end up in corners, garages and multipurpose rooms where the existing light is not ideal. Shadows across the 20, 5 and 1 segments make the board frustrating to use, and a ceiling light behind the thrower can cast a shadow at exactly the wrong moment.
Position the stand so the board face is evenly lit. If you use a ring light or board-mounted light, check that it is suitable for your type of setup and does not make the stand top-heavy. Good lighting should improve visibility without creating glare in your eyes at the oche. For more detail, see the guide to lighting a dartboard properly at home.
Step 8: Make the setup easy to repeat
The biggest weakness of a portable darts area is inconsistency. If you move the stand every time you finish playing, small differences in board angle, height and oche position can creep in. That is fine for a casual few legs, but it becomes annoying if you are practising doubles or trying to track improvement.
Use repeatable reference points. You might align one stand leg with a rug edge, use a removable floor marker for the front foot line, or keep a note of the stand height setting. Take a quick photo of the final layout if the room is shared and the stand needs to be folded away.
Before each session, run a 30-second check: bull at 1.73 m, oche at the right distance, stand stable, board straight, floor clear. That short routine is usually enough to make a freestanding dartboard feel like a proper home board rather than a compromise.
Common questions
Can you use a normal bristle dartboard on a stand?
Yes, many stands are designed for standard bristle dartboards, but you must check the mounting method and weight guidance for the stand you own. The board should sit flat, secure and centred.
Will a dartboard stand damage the floor?
The stand feet can mark delicate floors if they slide or carry concentrated pressure. Use a non-slip mat, darts mat or floor protector, and check the feet before dragging the stand into position.
Is a freestanding setup accurate enough for practice?
It can be, provided the board height, oche distance and board angle are consistent. The main issue is movement, so stability checks matter more than whether the board is wall-mounted.
Can I leave a dartboard stand up permanently?
Yes, if the room allows it and the stand is not in a walkway. Keep it away from damp areas, check the legs are locked, and make sure children or pets cannot knock it over.
Do I still need wall protection if there is no drilling?
Usually, yes. The board may be on a stand, but missed darts can still reach the wall or nearby furniture. A surround and backing area are sensible in most home rooms.
Main lessons
A no-drill darts setup works best when it is treated as a proper playing area, not a temporary balancing act. Choose a stable stand, measure from the board face, protect the room, and make the position easy to repeat. Get those details right and you can enjoy reliable home practice without putting a single fixing into the wall.