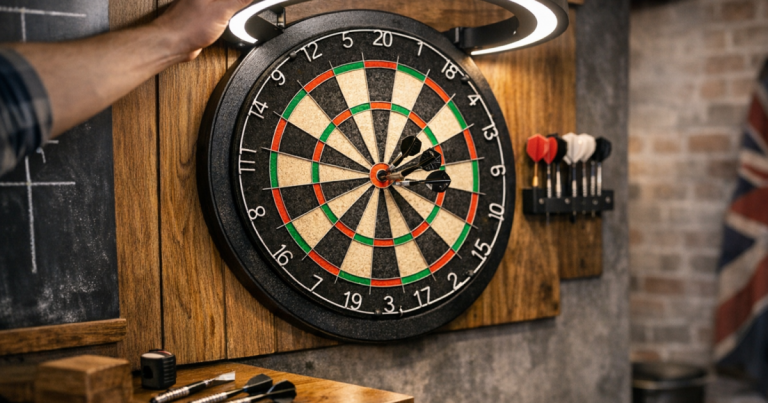
A dartboard cabinet tidies up the wall, protects the surrounding area and gives your darts setup a more finished feel. The safest way to fit a dartboard cabinet on plasterboard is to spread the load properly, confirm the playing position before drilling, and make sure the board finishes level at the correct height.
Plasterboard is not the same as brick, block or timber. It can work well for a home darts setup, but the cabinet, board and repeated door movement need fixings that suit a hollow wall.
Drilling into plasterboard and fixing a loaded cabinet where wall strength or hidden cables are in question should be carried out by a qualified installer, with fixing choices and cable checks meeting relevant UK safety requirements.
The short version
- Choose the cabinet position first, not the drill holes.
- Check ceiling, side and floor space before marking anything.
- Use studs where possible; where you cannot, use proper hollow-wall fixings rated for the load.
- Measure from the bullseye position, not just from the top of the cabinet.
- Fit the cabinet level, then check the dartboard height again once the board is installed.
1. Confirm the playing area before you touch the wall
Start by deciding whether the wall really gives you a usable darts space. A cabinet that looks neat when closed can still be awkward if the doors hit furniture, the throw line crosses a walkway, or the ceiling slopes near the board.
For a standard steel-tip home setup, the bullseye is usually set at 1.73 m from the floor. The throwing distance is usually 2.37 m from the face of the board to the oche. Check the rules you play to if your setup is for a league, soft-tip board or mixed use.
Look above and around the chosen spot before you mark the wall. Low ceilings, pendant lights and sloping loft-room walls can all make a cabinet feel cramped. If the board is going in a spare room, garage conversion or alcove, it is worth using this guide to check ceiling clearance before installing a dartboard before committing to the position.
2. Check what is behind the plasterboard
Plasterboard is usually fixed to timber studs, metal studs, or dot-and-dab adhesive over masonry. The fixing approach changes depending on what you find.
- Timber studs: the strongest everyday option for a cabinet. If the cabinet fixing holes line up with a stud, use suitable screws into the timber.
- Metal studs: these need compatible fixings and careful drilling. Do not treat them like timber.
- Hollow plasterboard: use quality hollow-wall anchors, toggle fixings or similar fixings designed for plasterboard.
- Dot-and-dab walls: there may be a gap behind the board before the masonry. Standard short plasterboard plugs can be unreliable in this situation.
Use a detector to check for cables and pipes before drilling. In UK homes, wiring may run vertically or horizontally from sockets, switches and fittings, so do not assume an empty-looking wall is clear. If the wall sounds hollow and sits near electrical points, take extra care before choosing the fixing locations.
3. Mark the bullseye height and cabinet centre line
Do not simply hold the cabinet at a comfortable height and drill. The dartboard position matters more than the cabinet outline.
Mark a light vertical centre line where the middle of the board will sit. Then mark the bullseye height at 1.73 m from the finished floor surface. Use the actual floor you will stand on, not a skirting board or temporary mat edge.
Next, check how your cabinet holds the board. Some cabinets have a pre-fitted bracket, while others need the dartboard bracket positioned separately. Measure the distance from the cabinet’s hanging points to the final bullseye position. This avoids the common mistake of mounting the cabinet level but ending up with the board too high or too low.
If your cabinet has a paper template, use it, but still verify it against the real board and bracket. Templates are helpful for hole spacing, not a substitute for checking the finished bullseye height.
4. Choose fixings that suit the wall, not just the cabinet
A dartboard cabinet is not usually a huge item, but it is still a live load: doors open and close, darts are removed from the board, and people may accidentally knock the cabinet during play. The fixings must suit both the wall and the total weight of the cabinet, dartboard and contents.
Where possible, get at least one fixing into a solid stud. If the cabinet is wide enough to catch two studs, even better. If the holes do not align, you can sometimes use a horizontal timber mounting batten fixed securely to studs, then attach the cabinet to the batten. Paint or finish the batten neatly if the cabinet will be visible in a living room.
If you are relying on hollow-wall fixings, use fixings specifically designed for plasterboard and check the manufacturer’s load information. Avoid basic plastic wall plugs intended for masonry; they can spin, crush the plasterboard or pull out under movement.
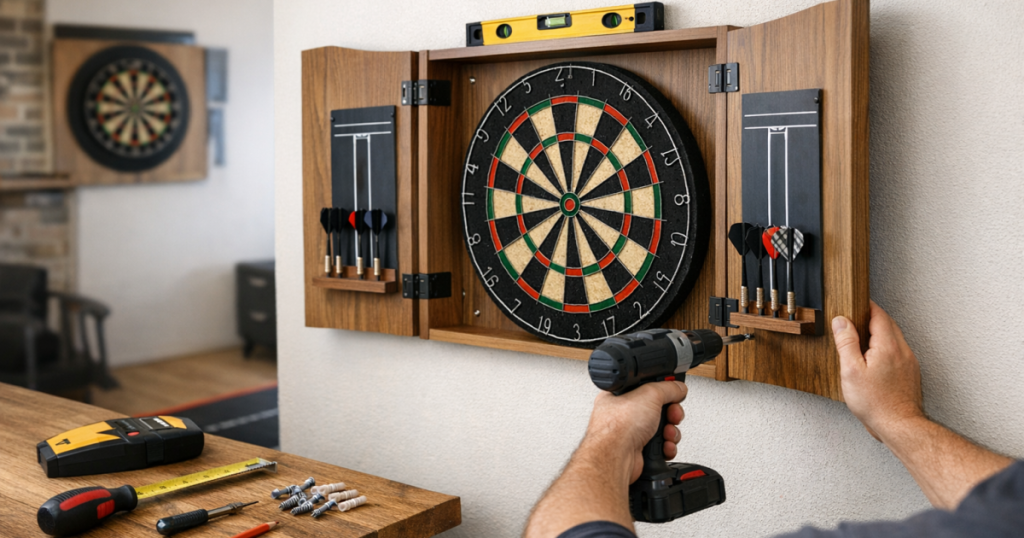
5. Drill cleanly and install the cabinet without rushing
Once the position is confirmed, hold the cabinet or template against the wall and mark the fixing points clearly. Use a spirit level across the top and check the centre line again. Plasterboard marks easily, so use light pencil marks rather than deep scoring.
Drill the correct size holes for the fixings you are using. The fixing packaging should state the drill size and wall type. If the hole becomes oversized, do not try to rescue it with a random plug; move the fixing point where possible or use an appropriate repair and fixing method.
Fit the anchors, offer the cabinet up, and tighten the screws evenly. Do not overtighten into plasterboard, as this can crush the board and weaken the fixing. The cabinet should sit flat without twisting. Open and close both doors to check they do not drift, scrape or swing shut by themselves.
For a deeper walkthrough on levelling and avoiding a wonky cabinet, see the separate guide on how to mount a dart cabinet level on plasterboard.
6. Fit the board and recheck the measurements
With the cabinet secure, install the dartboard bracket and board. Check that the 20 segment is at the top and that the board sits firmly without wobble. Then measure from the floor to the bullseye again. It is easier to correct a small bracket error now than after you have built the rest of the setup around it.
Stand at the oche position and look back at the board. Check that the cabinet doors are clear, the board is not tucked too close to a corner, and the light falls evenly across the scoring area. A cabinet can cast side shadows if the room lighting is coming from only one direction.
If you use a dart mat, remember that it can slightly change the standing surface. For most casual setups this is minor, but if you want the setup to feel consistent, measure from the surface you actually throw from.
7. Make the area safer between games
A fitted cabinet helps keep the board covered, but it does not make the whole darts area child-safe by itself. Remove darts after play, close the doors, and keep the throw line clear so nobody trips over a mat or oche. If the cabinet is in a family room, shared hallway or multipurpose space, build a simple between-games routine.
That routine might include storing darts out of reach, closing the cabinet doors, moving furniture back into place, and checking that no loose tips or broken flights are left on the floor. For more detail, use the guide on how to childproof a dartboard area between games.
Common mistakes to avoid
- Mounting the cabinet first and measuring the board later: this often leaves the bullseye at the wrong height.
- Using masonry plugs in plasterboard: they are not designed for hollow boards and can pull loose.
- Ignoring door swing: cabinet doors need space to open without hitting curtains, shelves or picture frames.
- Forgetting the board face distance: the oche distance is measured from the face of the dartboard, not the wall behind it.
- Overtightening screws: crushing the plasterboard can weaken the fixing rather than strengthen it.
Questions people ask
Can I fit a dartboard cabinet on plasterboard without finding a stud?
Yes, but only with suitable hollow-wall fixings rated for the load and the wall type. A stud or solid backing is still the better option where available.
How high should the cabinet be?
Set the cabinet so the dartboard bullseye ends up at the correct height, normally 1.73 m from the floor for standard steel-tip play. The cabinet height itself is secondary.
Should I use a backing board behind the cabinet?
A backing board can help spread the load and protect the wall, especially if fixed into studs. It also gives you more freedom when lining up cabinet fixing holes.
What if the plasterboard crumbles when I drill?
Stop and reassess the fixing point. Crumbling, oversized or damaged holes are poor fixing points, so use an appropriate repair method or move to a stronger position.
Can I hang darts and accessories inside the cabinet?
Usually, yes, but keep the extra weight modest and check the cabinet and fixing load guidance. Heavy accessories are better stored separately.
The big picture
A neat plasterboard installation comes down to planning before drilling. Confirm the playing space, mark from the bullseye, identify the wall structure, and choose fixings that match the surface. Once the cabinet is up, recheck height, level and door clearance before you start throwing. Done carefully, a plasterboard wall can support a clean, practical home darts setup without the cabinet feeling like an afterthought.