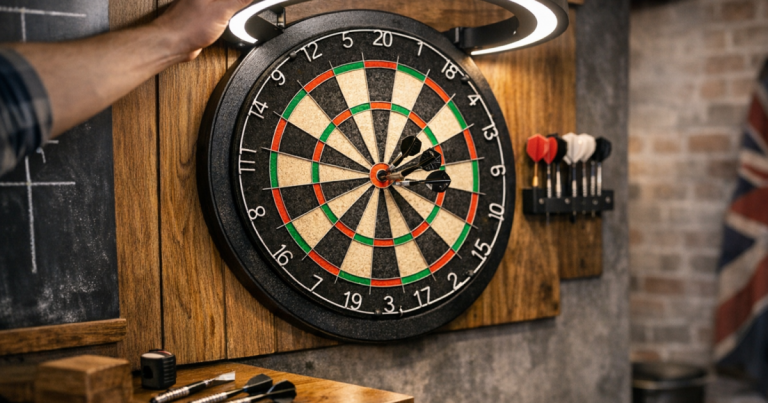
A removable darts oche gives you a consistent throw line without permanently fixing anything to the floor. It is ideal for spare bedrooms, garages, rented homes and shared rooms where a taped line either looks untidy or gets lifted every time the vacuum comes out. The aim is simple: make a stable front edge you can feel with your foot, then store it away when the board is not in use.
The short version
For most home setups, the neatest option is a low, portable oche made from a straight timber or MDF base with a raised front lip and non-slip underside.
- Set the front edge at 2.37 m from the face of a standard steel-tip dartboard.
- Use the face of the board, not the wall, as your measuring point.
- Make the oche wide enough that you can stand naturally without hunting for the line.
- Add rubber or grippy backing so it does not creep during a match.
- Mark a centre line so the oche returns to the same position every session.
A raised edge feels more natural than a flat tape mark because your front foot can rest against it, but the build should still be low enough to avoid becoming a trip hazard when people walk through the room.
Plan the removable darts oche before you cut anything
Start by confirming that the room can actually take a full darts setup. The standard steel-tip throw distance is 2.37 m from the face of the board to the front edge of the oche, with the bull at 1.73 m from the floor. That measurement should be horizontal, not diagonal along the floor if the wall or board sits proud.
If the board is in a compact room, check door swings, furniture, radiators and whether anyone needs to pass behind the thrower. A spare bedroom can look long enough until you account for the bed frame, wardrobe handles and the depth of a dartboard cabinet. If you are still planning the space, use this room-measuring method for checking a spare bedroom for a dartboard setup before committing to the oche size.
For a home oche, accuracy matters more than making it look like a pub setup. A slightly wider, more stable removable strip is usually better than a narrow piece that slides or twists when you plant your foot.
Choose the style that suits your floor
Raised portable strip
This is the best all-round version for most homes. You build a flat base with a raised front edge, position it for play, then lift it away afterwards. It gives your foot a physical stop, which makes repeat throwing easier than standing behind a thin floor mark.
Flat removable line
A flat line is the simplest option. It can be a strip of removable floor tape, a narrow mat edge, or a marked line on a dedicated darts mat. It is tidy and easy to store, but it does not give the same foot feedback as a raised oche. It also depends heavily on how well the surface grips your floor.
Mat-mounted oche
If you already use a dart mat, you can add a removable raised strip to the mat rather than the floor. This keeps the measuring point and floor protection together, which is useful in rooms that switch between darts, work and family use. The key is stopping the mat itself from moving; if the whole mat creeps forward, the oche moves with it. For floor-specific grip and placement advice, see the guide to choosing a dart mat for carpet or hard floors.
What you need
You do not need a workshop-standard build. A clean, straight, well-measured oche is enough. Suitable materials include MDF, plywood or a straight timber board for the base, plus a smaller timber strip for the raised front edge.
- A base piece around 600–800 mm wide gives most players enough room to stand comfortably.
- A depth of around 100–200 mm helps stability without making the oche bulky.
- A raised front lip of around 25–38 mm gives clear foot feedback without feeling excessive.
- Rubber feet, non-slip matting or grippy pads help stop movement on hard floors.
- Fine sandpaper removes sharp corners and makes the oche nicer to handle.
- A tape measure, pencil, square and saw are enough for a basic version.
For a more regulation-style feel, many players aim for a raised edge close to 38 mm high. For casual home play, consistency is the main point: if the oche always sits in the same place and gives the same foot stop, it will do its job.
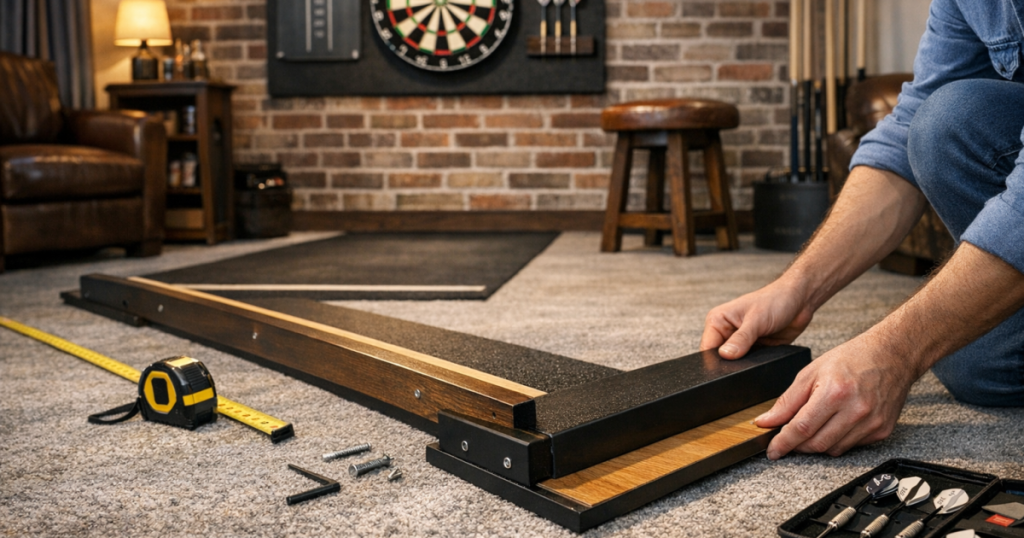
Step-by-step: build the oche
1. Cut the base straight
Cut your base board to the width and depth that suits the room. Keep the front edge square because this is the line you will throw from. If the cut is angled, your stance will be angled too, even if the distance measurement is technically correct at one point.
2. Add the raised front edge
Fix the raised strip along the front edge of the base. Wood glue and screws give a sturdy result, but keep fixings flush so there are no sharp edges or raised screw heads. If you want a no-screw build, a strong adhesive can work, provided it is suitable for the materials and has fully cured before use.
3. Smooth every edge
Sand the top, corners and underside. This matters more than it sounds. A removable oche is handled regularly, slid under beds, leaned against walls and moved by other people in the house. Rounded edges are kinder to skirting boards, carpets and fingers.
4. Add grip underneath
On hard floors, use rubber feet or a grippy underside so the oche does not skid. On carpet, a wider base is often more stable than tiny feet, because it spreads the pressure and resists tipping. Avoid anything sharp or spiked unless you are happy with the risk of marking the floor covering.
5. Mark the centre
Add a small centre mark on the oche, aligned with the centre of the bull. This helps you put it back in the same place quickly. You can also make two discreet floor reference marks just outside the oche footprint if the flooring allows it, but do not use anything that could stain or lift the surface.
6. Test it with real throws
Stand normally, throw a few visits and watch whether the oche moves. Then step away and return as you would during a match. A good removable build should stay put without needing to be nudged back after every leg.
Set the distance accurately
The most common mistake is measuring from the wall instead of from the dartboard face. A board, surround or cabinet can add depth, so the wall is not the playing surface.
To set the line properly, hang a plumb line or drop a straight edge down from the face of the board to the floor. Mark that floor point lightly, then measure 2.37 m straight out to where the front edge of the oche should sit. Keep the tape measure square to the board, not angled across the room.
Once the oche is in place, check the diagonal from the bull to the front edge if you want a second confirmation. For a standard steel-tip setup with the bull at 1.73 m, the diagonal is approximately 2.93 m. The horizontal distance is still the main measurement to get right.
Make it feel stable without making it permanent
A removable oche should not rely on weight alone. If it is too light, it will creep. If it is too heavy, nobody will want to move it. The sweet spot is usually a broad enough footprint, a straight front lip and enough underside grip for the floor type.
- For laminate, vinyl or tiled floors, use rubber contact points and clean the floor before placing the oche.
- For carpet, avoid a narrow base that rocks under your foot; a deeper board is usually steadier.
- For garages, check that the floor is reasonably flat, as uneven concrete can make the oche wobble.
- For shared rooms, choose a low-profile design that can be lifted one-handed and stored safely.
If you play near a party wall or in an upstairs room, the oche itself is only one part of the comfort equation. Foot placement, board mounting and floor covering can all add noise. The separate guide on how to make a darts setup quieter for shared walls is worth reading before you finish the whole area.
Common mistakes to avoid
- Making it too narrow: a tiny oche is easy to store but annoying during play, especially if different players use different stances.
- Using a slippery underside: smooth wood on smooth flooring will move unless you add grip.
- Measuring from the skirting board: always measure from the face of the dartboard.
- Leaving sharp corners: removable gear gets carried and stored, so smooth it properly.
- Ignoring the mat: if the mat moves, your throw line moves too.
- Overbuilding it: a huge raised platform can become awkward in a normal UK home, especially in a multi-use room.
Questions people ask
Can I use tape instead of building an oche?
Yes, tape works for casual play if it stays straight and does not damage the floor. A raised removable oche is better if you want foot feedback and a more consistent stance.
How wide should a home darts oche be?
A width of around 600–800 mm is practical for most home players. It gives enough room for different stances without becoming awkward to store.
Should the oche sit on top of a dart mat?
It can, provided the mat does not slide. If the mat moves during play, fix the mat grip issue first or your measured line will not stay accurate.
Can I build one for a rented home?
Yes. Use a freestanding design with rubber or non-marking grip underneath, and avoid screws, adhesive pads or tapes that could damage flooring.
Does the oche height need to be exact?
For competitive practice, aim for a regulation-style raised edge. For home play, a consistent, clearly felt front edge is more important than copying every formal detail.
The big picture
A good home oche is not about making the room look like a tournament stage. It is about removing doubt from every throw. When the line is straight, the distance is correct and the base stays put, you can concentrate on rhythm rather than rechecking your feet.
Build it simple, keep it easy to move, and test it in the room where it will actually be used. That is what turns a small piece of timber into one of the most useful upgrades in a home darts setup.