A dartboard cabinet only looks right when the bull, board face and oche still land where they should. The cleanest way to fit a dartboard cabinet is to set the board position first, then make the cabinet serve that position rather than the other way round. That avoids the common mistake of centring the cabinet on the wall and discovering the treble 20 is high, low or slightly off to one side.
Tracing hidden electrical cables or pipework before drilling, and any drilling close to those services, should be carried out by a qualified professional to meet UK safety standards and local building requirements.
The short version
- Mark the bullseye position on the wall before marking the cabinet outline.
- Use the board bracket position, not the cabinet top edge, as your reference point.
- Keep the bull at 1.73 m from the floor for a standard steel-tip setup.
- Check the oche from the board face, not from the wall or cabinet front.
- Hang the cabinet loosely first, test the board position, then fully tighten the fixings.
Start with the board position, not the furniture
A dartboard cabinet is basically a frame around the board. It should not decide where the board goes. Your first reference is the bullseye, because that controls the playing height and the throw line.
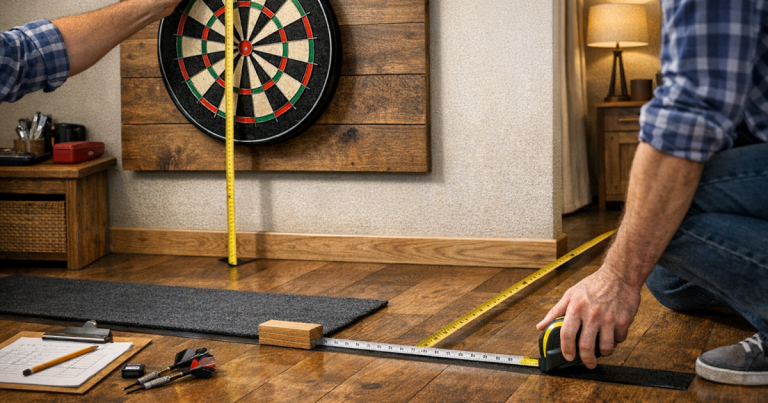
For a standard steel-tip home setup, the centre of the bull should be 1.73 m above the floor. The throwing distance is normally 2.37 m from the face of the dartboard to the oche. If you want to double-check the full layout before marking the wall, use the guide to dartboard sizes, measurements and regulations so your height and throw line match the usual setup.
Do not assume an existing screw hole, picture hook or cabinet fixing is correct. Previous boards are often a few millimetres out, and that small error becomes obvious once the cabinet doors create straight visual lines around the board.
Tools and checks before you mark the wall
You do not need specialist kit, but you do need to measure patiently. Gather everything before holding the cabinet up, because guessing while supporting the weight is how alignment mistakes creep in.
- Tape measure with clear metric markings.
- Pencil or low-tack masking tape for temporary marks.
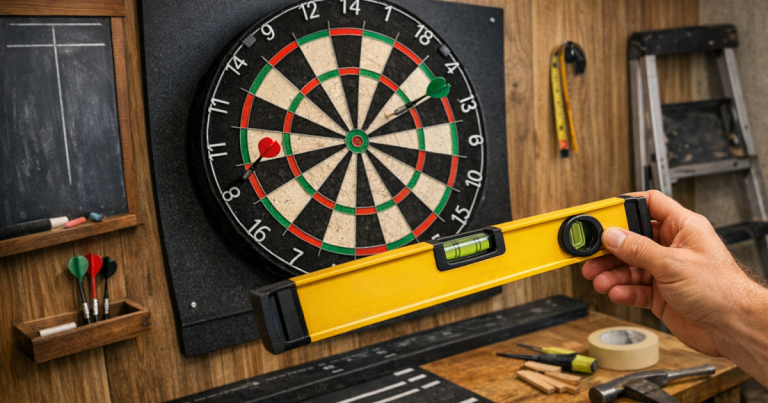
- Spirit level, ideally long enough to span the cabinet width.
- Stud, cable and pipe detector suitable for your wall type.
- Drill, wall plugs and screws suited to the wall construction.
- Screwdriver or driver bit for final tightening.
- The dartboard, centre screw and cabinet bracket that will actually be used.
Lay the cabinet flat and look at how the board will hang. Some cabinets have a central bracket already fitted to the back panel. Others need the bracket screwed into the cabinet back. Either way, the critical point is where the board centre screw sits once the board is hanging. That point must align with the bull height mark.
Step 1: mark the bull height and centre line
Measure 1.73 m up from the finished floor and make a small mark. If the room has carpet, measure from the walking surface, not from the subfloor or skirting line. If you use a darts mat permanently, the mat’s thickness is usually small, but still keep your reference consistent with the surface you stand on.
Next, draw a light vertical centre line through the bull mark. Masking tape works well because you can mark on the tape and remove it afterwards. Extend the line far enough above and below the mark to help position the cabinet squarely.
This centre line matters more than the cabinet width. A cabinet can be level and still be offset. If the board sits a little left or right inside it, the setup will feel wrong even if the doors open neatly.
Step 2: identify the cabinet’s true board centre
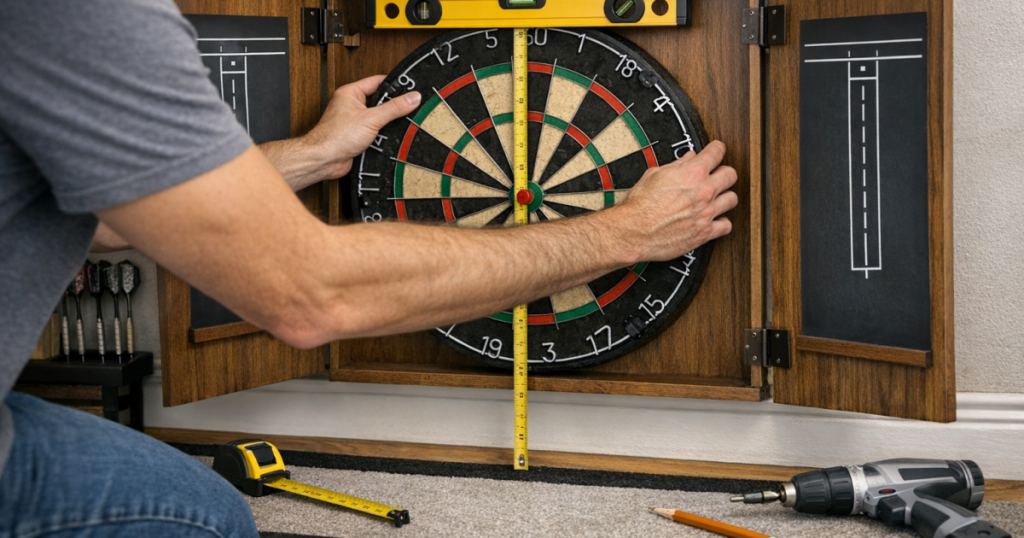
Open the cabinet and find the board mounting point. Do not measure to the outer edges of the doors, chalkboard panels or decorative trim. Measure to the bracket notch or fixing point that actually supports the dartboard centre screw.
If the bracket is already fitted, hold the cabinet up and line that bracket point with your bull mark. If the bracket is not fitted yet, mark the intended bracket location on the cabinet back first, using the manufacturer’s instructions for that cabinet and the board’s centre screw.
For a useful sanity check, measure from the bracket point to the inside left and right edges of the cabinet. The distances should be equal if the board is intended to sit centrally. If they are not, follow the cabinet’s mounting design rather than forcing the outside frame to look symmetrical at the expense of the board.
Step 3: hold the cabinet in place and mark the fixing holes
With the doors open, lift the cabinet so the bracket point sits on the bull mark and the cabinet’s vertical centre follows your wall centre line. Use the spirit level across the top or an internal horizontal surface, but do not rely on the top alone if the cabinet trim is uneven.
Once the bracket point, centre line and level all agree, mark the wall through the cabinet fixing holes. If the holes are hidden behind the board area, remove the board and any loose panels before marking. Keep the pencil straight through the holes so the marks do not shift sideways.
If you have not yet chosen the cabinet or you are replacing one that never sat quite right, the room fit matters as much as the mounting process. Door swing, scoreboard panels, surround clearance and wall width are covered in more detail in the guide to choosing a dartboard cabinet that suits your room.
Step 4: drill, plug and hang it loosely
Check the marked points with your detector before drilling. Drill at the marked points using a bit suitable for the wall and the fixings. The fixing type depends on the surface: plasterboard, masonry and timber all need different support. A cabinet plus a bristle board has enough weight that weak plugs or shallow fixings can allow the cabinet to creep over time.
Insert the plugs where needed, then mount the cabinet with the screws partly tightened. At this stage, leave a little movement so you can correct tiny shifts. Place the spirit level on the cabinet again and check that the centre line still runs through the board mounting point.
If you are fixing into masonry, it is worth being more deliberate with bit choice, plug depth and dust removal from the holes. The separate guide to mounting a dartboard on a brick wall is a helpful next read if your cabinet is going onto brick rather than plasterboard or timber.
Step 5: hang the board and test before tightening
Fit the centre screw into the back of the dartboard, hang the board on the cabinet bracket, and rotate it so 20 is at the top. Now measure from the floor to the centre of the bull. This is the moment to catch any small drop caused by the screw head settling into the bracket.
If the bull is a few millimetres out, do not ignore it. Loosen the cabinet fixings and adjust the cabinet if the fixing holes allow it. If the cabinet is correctly placed but the bracket itself is slightly off, reposition the bracket rather than moving the whole cabinet and spoiling the centre line.
Also stand back from normal throwing distance and look at the visual alignment. The board should sit comfortably inside the cabinet opening, with the doubles ring visible all the way round. The doors should open freely without pushing the cabinet out of level or fouling nearby shelves, curtains or door frames.
Step 6: confirm the oche after the board is in place
The oche is measured from the face of the dartboard, not the wall behind it. A cabinet can change the board’s projection slightly, so an old floor mark may no longer be accurate. Measure 2.37 m from the board face to the throwing line for a standard steel-tip setup.
If measuring along the floor is awkward because of skirting boards or furniture, use the diagonal check from the bull to the oche line. For a standard steel-tip layout, that diagonal is commonly 2.93 m from the centre of the bull to the oche. It is a useful cross-check, especially in tight UK spare rooms, garages and converted office corners where the wall and floor edges are not always perfectly square.
Common mistakes that cause misalignment
- Using the cabinet top as the main reference: the top edge may be decorative, slightly bowed or not the same distance from the board bracket on every cabinet.
- Marking with the doors closed: closed doors hide the true bracket point and can make the cabinet look centred when the board is not.
- Forgetting the board face projection: the throw line must relate to the board face after the cabinet and board are installed.
- Fully tightening too early: tighten only after the board has been hung and the bull height has been checked.
- Trusting an old setup blindly: old holes may have been drilled for a different board, a surround, or simply marked incorrectly.
Helpful questions
Should the cabinet or the dartboard be centred on the wall?
The dartboard should take priority. Centre the bull and board on the intended throwing line first, then align the cabinet around that position. A cabinet that looks centred on the wall but moves the board off line will affect the setup.
Can I reuse the old dartboard bracket holes?
Only if they put the bull at 1.73 m and keep the board centred inside the cabinet. Check the height and centre line before committing, because old holes are often slightly wrong for a new cabinet.
Why does my board look low after I hang it?
The centre screw may be sitting lower in the bracket than expected, or the cabinet may have slipped while the screws were tightened. Measure to the bull after the board is hanging, not before.
Do I measure the oche from the wall or the board?
Measure from the dartboard face. The cabinet and bracket can move the board forward from the wall, so using the wall as the reference can leave the oche too long.
Main lessons
The reliable method is simple: mark the bull, align the bracket to that mark, hang the cabinet loosely, test with the board in place, then tighten everything only when the measurements are right. Work from the playing geometry rather than the furniture, and the cabinet will look neat without compromising the throw.
If the board height, centre line and oche all check out after installation, the cabinet has done its job: it tidies the wall, frames the board and keeps the setup feeling natural from the first visit to the oche.