A well-lit board makes home practice feel sharper, fairer and more enjoyable. A good dartboard lighting setup should let you see every segment clearly without throwing shadows across the treble bed, dazzling the thrower, or leaving awkward cables around the room. In a UK home, that usually means working around modest room sizes, low ceilings, shared spaces, plug sockets, cabinets and the occasional garage or garden room setup.
Mains wiring for permanent wall, ceiling or fused-spur lighting should be carried out by a qualified electrician to comply with UK electrical safety requirements and current wiring standards.
At a glance
- Aim for even light across the full board, not just a bright patch in the middle.
- Reduce shadows by lighting from around the board rather than from one side of the room.
- Keep the throw line clear of trailing leads, floor lamps and unstable stands.
- Check whether your cabinet, surround or electronic board affects how a light can be fitted.
- Use neutral white light for visibility, and avoid overly harsh glare in small rooms.
Start with the board position, not the light
Lighting works best when the board position is already right. If the board is too close to a side wall, tucked into a dark alcove, or mounted in a spot where the thrower blocks the main room light, even a bright lamp can struggle. Before adding anything, stand at the oche and look at the board as you would during a real throw. If your head or shoulder casts a shadow across the scoring area, the main room light is in the wrong place for darts.
The standard steel-tip throw is measured from the face of the board to the oche, so lighting should not interfere with that space. If you are still planning the room layout, it is worth checking the practical measurements in this home darts oche setup guide before fixing anything permanently. A tidy lighting setup is much easier when the board, mat, throw line and standing area are already settled.
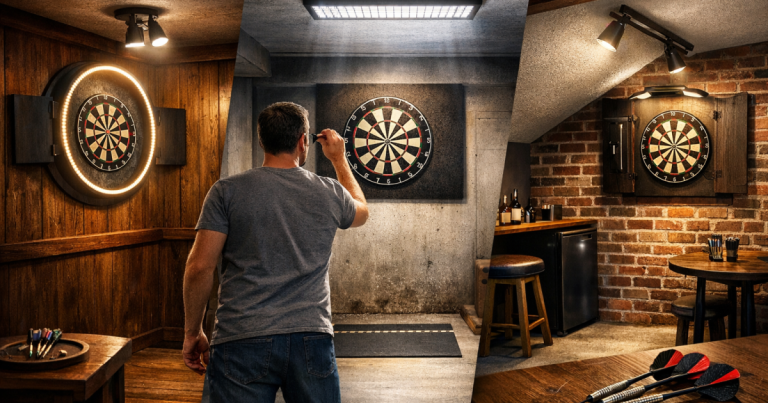
In many UK homes, the board ends up in a spare room, dining room, garage, hallway end, conservatory or garden office. Each space behaves differently. A garage may need brighter, more focused light because of darker walls and fewer windows. A living room may need a neater fitting that does not dominate the space. A narrow room may create side shadows if the only ceiling pendant sits behind the thrower.
Why shadows are the main problem
Most lighting complaints around a dartboard are not really about brightness; they are about unevenness. A single ceiling pendant can make the top half of the board bright while the lower numbers sit in shadow. A lamp placed to one side can make darts cast long shadows across the scoring bed. Even a strong overhead light can be poor if the thrower stands between the light source and the board.
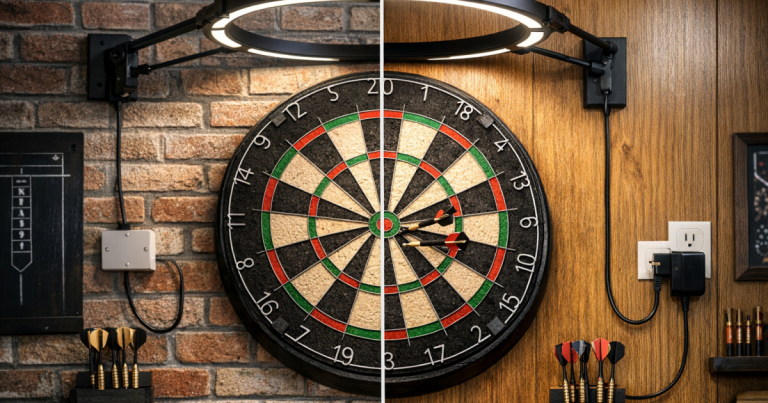
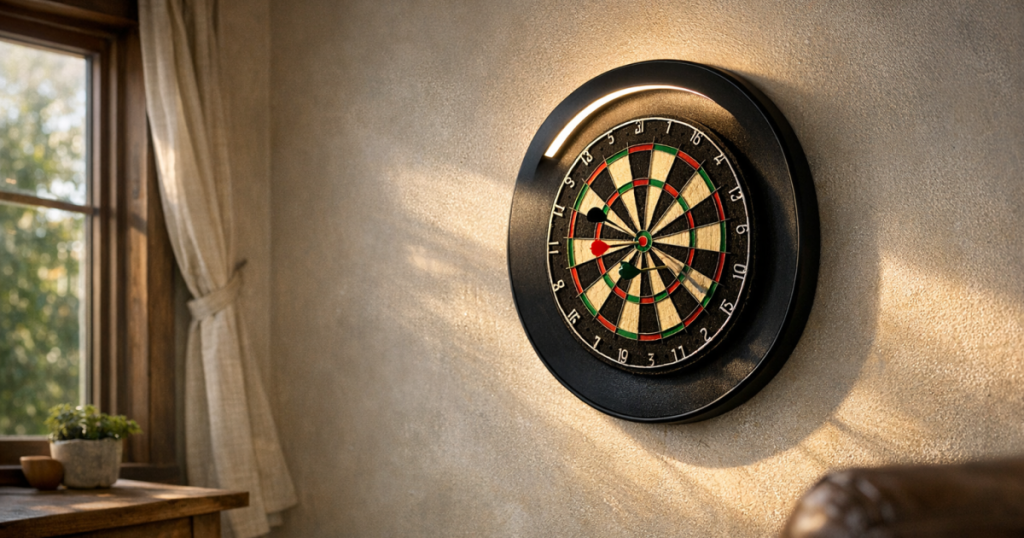
Good dartboard lighting spreads illumination around the board face. That is why dedicated ring-style lights and illuminated surrounds have become popular for home setups. They place the light close to the board, usually around its edge, so the light falls evenly across the segments from multiple directions. This reduces the harsh dart shadows you get from one-sided lighting.
That does not mean every room needs a dedicated ring. A well-positioned wall light, adjustable picture light, track light or ceiling spotlight arrangement can work if it avoids glare and gives even coverage. The important test is simple: stand at the oche, throw three darts, and look for shadows on the board while the darts are in place. If the shadows cover doubles, trebles or the bull, the lighting still needs work.
Common lighting approaches for home boards
Dedicated dartboard ring lights
Ring lights are the neatest route for many players because they are designed for the job. Products such as the Winmau Plasma Dartboard Light and Mission Torus 270 Dartboard Light are recognisable examples of lights made to sit around a conventional bristle board. They are intended to improve visibility across the scoring area while keeping the room setup compact.
The main practical point is compatibility. Some ring lights grip around the board, some need space around the outside edge, and some may be awkward with thick cabinets, unusual surrounds or very tight wall recesses. Before fitting one, check whether the light will sit clear of the board, whether the door of a cabinet can still open, and where the power lead will run.
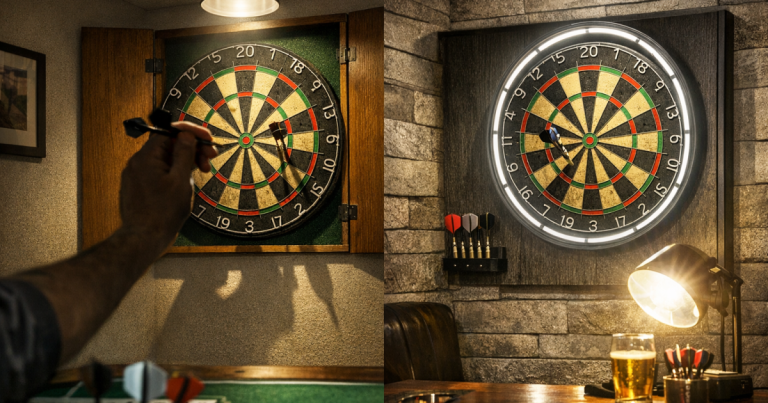
Illuminated surrounds
An illuminated surround combines wall protection with integrated lighting. The Unicorn Solar Flare Illuminated Dartboard Surround is one example of this style. This can be useful where you want a cleaner-looking setup without separate light arms or clips around the board.
The trade-off is that it changes the footprint around the board. If your board is already inside a cabinet, or you have limited wall space, an illuminated surround may not fit neatly. It is also worth thinking about bounce-outs and dart retrieval: the light should not make it awkward to remove darts or rotate the board.
Ceiling spotlights and track lighting
Ceiling spotlights can work well in a multi-use room, particularly if you do not want a dedicated dartboard fitting visible all the time. The challenge is position. A spotlight directly above or behind the thrower will often create shadows. A spotlight aimed towards the board from in front and slightly above can be better, but it must not shine into the player’s eyes.
Track lighting gives more adjustment than fixed downlights. In a garage or games room, two or three adjustable heads can be angled towards the board to reduce shadowing. Keep the beam spread wide enough to cover the full board and surround, not just the centre. If you are relying on ceiling lights alone, test the board from the oche at night as well as during the day; daylight can hide weaknesses in the setup.
Cabinet-mounted or picture-style lights
A small picture light above a cabinet can look tidy in a living space, but it can also create strong downward shadows if used on its own. It tends to brighten the upper half of the board more than the lower scoring area. If you like the look, treat it as part of the room lighting rather than the only light for serious practice.
Cabinets and surrounds also affect how much spill light reaches the board. A deep cabinet can shade the edges, while a dark surround can make the board feel dimmer than it really is. For more on fitting protection around the board without making the setup awkward, see this guide to dartboard cabinets and surrounds for UK home setups.
Brightness, colour and glare
For darts, more light is not always better. A very bright fitting in a small room can create glare, reflections on wire, and eye strain during longer practice sessions. The aim is clear contrast between the sisal, numbers, wires and flights without making the board look washed out.
Neutral white light is usually the safest starting point. Very warm light can make the board look cosy but may reduce contrast, especially on darker boards. Very cool light can feel clinical and harsh in a small spare room. If the light has settings, try a middle neutral tone first and adjust from there.
Glare matters most at the oche. Stand in your normal throwing position and look at the board, not the light. If the fitting catches your eye, reflects off metal numbers, or distracts you during aim, adjust the angle or position. A good setup should disappear into the background once you start throwing.
Cables and power in UK rooms
Many dedicated dartboard lights use a plug-in power supply, which is convenient but can leave a cable hanging near the board. Keep leads away from the scoring area, the floor around the oche, and any place where someone might catch them while collecting darts. Cable clips or trunking can help tidy a lead down the side of a cabinet or along a skirting board.
Avoid running extension leads across the throwing lane. It looks untidy, but more importantly it creates a trip point in the one area where players repeatedly walk back and forth. If the nearest socket is badly placed, the neatest answer may be repositioning the board rather than stretching cables across the room.
In garages and garden rooms, check that the socket location suits the layout and that the light is appropriate for the environment. Damp, dusty or unheated spaces can be harder on electrical accessories than a normal indoor room. Keep plug-in connections off the floor and away from areas where condensation or impact is likely.
Electronic boards need a slightly different check
Electronic dartboards often have built-in displays, buttons and plastic segment surfaces, so reflections can be more noticeable than on a traditional bristle board. A light that works nicely on a sisal board may bounce glare off the plastic face of an electronic board, especially if it is mounted high or angled too directly.
Before committing to any lighting position, switch the board on and test visibility with the display active. Look for glare on the scoring segments, shadows from cabinet doors, and whether the display remains readable from the oche. If you are still deciding between board types, this guide to bristle or electronic dartboards for UK home players explains the setup differences in more detail.
A practical setup sequence
The easiest way to avoid mistakes is to test before fixing. You do not need to drill holes immediately. Use temporary positioning, painter’s tape, a clamp lamp for testing, or a helper holding the light where it might sit. Then view the board from the oche, from close up, and from the side.
- Set the board at the correct height and confirm the throw distance.
- Turn off competing lamps so you can judge the dartboard light properly.
- Check the full face of the board, including doubles and outer numbers.
- Throw a few darts and look at the shadows they cast while embedded.
- Stand in your normal stance and check for glare in your line of sight.
- Plan the cable route before attaching clips, trunking or adhesive pads.
- Test at the time of day you play most often, especially after dark.
This is also the point to think about room use. If the space doubles as a dining room or office, you may want lighting that looks subtle when the board is not in use. If it is a garage practice area, function may matter more than appearance. Neither approach is wrong; the right lighting is the one that makes the board clear without making the room awkward.
Small-room details that make a difference
UK homes often involve compromises: chimney breasts, radiators, alcoves, low ceilings, sloping garage roofs and limited sockets. In a tight room, the biggest improvement may come from controlling spill and shadows rather than adding raw brightness. Light-coloured walls around the board can help reflect light softly. Dark walls and dark cabinets can make the board feel more enclosed.
Keep nearby mirrors, glossy frames and glass cabinet fronts in mind. They can reflect light back towards the thrower, which becomes irritating over a longer session. If glare appears from a picture frame or window, a small change in angle can be more effective than changing the main dartboard light.
Noise and impact also matter. A light that clips loosely, rattles when darts hit the board, or shifts during board rotation will become annoying quickly. Check that the fitting stays secure when the board is used normally. If you rotate a bristle board regularly, make sure the light can be removed or adjusted without turning routine maintenance into a fiddly job.
Final thoughts
A reliable dartboard lighting setup is less about creating a showroom effect and more about making every throw readable. The board should be evenly lit, the thrower should not be dazzled, and the room should stay safe and tidy. Start with board position, test for shadows, manage cables carefully, and choose a lighting style that fits the way the room is actually used.
For most home players, the biggest gains come from moving the light closer to the board, spreading illumination more evenly, and removing trip hazards from the oche area. Get those basics right and the whole setup feels calmer, cleaner and much easier to practise on.