A reliable home setup starts with a repeatable throw. A dart mat oche solves two common home-board problems: it marks the legal throwing distance and gives your floor a defined playing lane. The right mat should sit flat, line up with the board face, suit your room, and be easy to reset if it moves.
For most UK home players using a steel-tip board, the key measurement is 2.37 m from the face of the dartboard to the toe line, not from the wall. That distinction matters because cabinets, backboards and board brackets can all change where the board face actually sits.
What to know first
- Measure from the board face: the oche line should be 2.37 m from the front surface of a standard steel-tip dartboard.
- Set the board height first: the bullseye should be 1.73 m from the floor before you line up the mat.
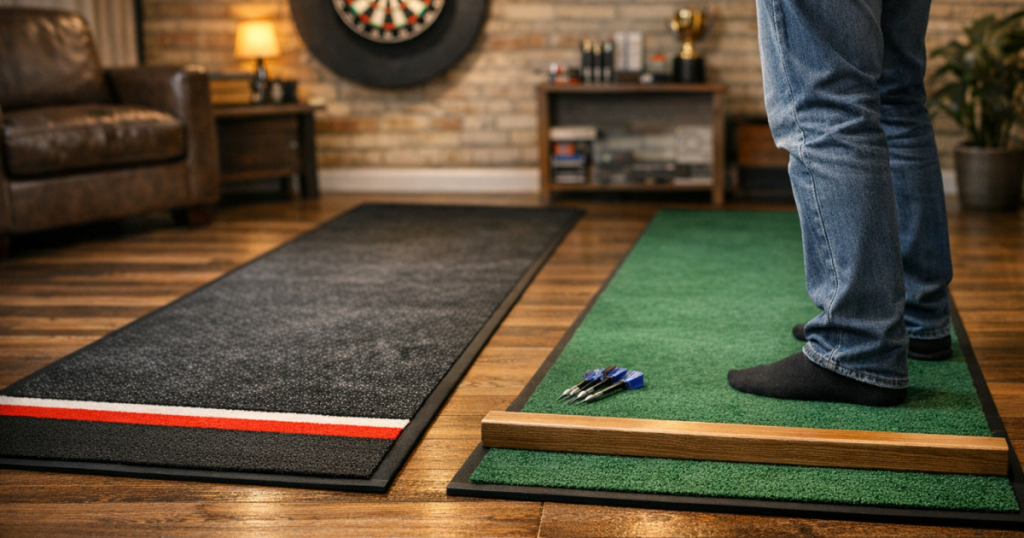
- Choose the oche style: a printed line is simple, while a raised toe bar gives a more physical stop.
- Check the room depth: allow space behind the thrower as well as the marked throwing distance.
- Think about flooring: smooth laminate, carpet and uneven floorboards all affect how a mat behaves.
- Plan storage: a roll-up mat is convenient only if it lays flat again quickly and the markings stay readable.
Step 1: confirm the board position before buying the mat
A dart mat can only set the right line if the board is already in the correct place. Start by checking the bullseye height, then look at how far the front of the board projects from the wall. If your board is inside a cabinet, fitted to a backboard or mounted on a thick bracket, the throwing distance still starts from the board face.
This is where many home setups drift slightly out. Measuring from the skirting board or wall can make the throw longer than intended, and moving the mat later can be annoying if furniture is already arranged around it. Use a tape measure from the board face to the floor, mark the correct point lightly, then compare that point with the mat’s printed or raised line.
If you are still deciding between a flat line, raised block or more permanent marker, it is worth reading our guide to different oche types before choosing the mat. The mat is only one way to define the toe line, and the best option depends on how permanent your setup can be.
Step 2: choose the type of oche marking
Dart mats usually handle the throw line in one of three ways: a printed line, a raised oche, or a mat that is used alongside a separate marker. None is automatically better for every home setup, so think about how you throw and how often the mat will move.
Printed oche line
A printed line is the easiest option for shared rooms, garages and occasional play. It keeps the mat flat and avoids anything that might catch a foot when someone walks across the room. The downside is that you need to be disciplined about not creeping over the line, especially during longer practice sessions.
Raised toe bar
A raised oche gives a clear physical stop for your front foot. It feels closer to a club or competition setup and helps with consistency because you can place your toe against the same edge each time. Before buying, check whether the raised section is fixed, removable or supplied separately, and make sure it will not become a trip point in a multi-use room.
Separate marker with a mat
Some players prefer a plain protective mat plus a separate throw line marker. This can work well if you already have a mat you like, or if the printed oche on a mat does not match your board position. It also gives flexibility in a rented home where you do not want anything permanent on the floor.
Step 3: check the measurement system and markings
A good dart mat should make setup easier, not introduce another source of error. Look for clearly printed distance markings and check whether they are intended for steel-tip, soft-tip or multiple formats. If a mat shows several lines, make sure the steel-tip line is obvious enough that guests will not use the wrong one.
For a standard steel-tip home board, set the toe line at 2.37 m from the board face. A diagonal measurement from the bullseye to the oche is also commonly used as a confirmation check, but the face-to-line measurement is the one most home players will use when setting out the room. Soft-tip setups can use a different distance, so verify the rules for the board or format you play.
If you are comparing product listings, do not rely only on a lifestyle photo. Check the manufacturer’s description, marking layout and whether the mat is sold for steel-tip darts, soft-tip darts or general floor protection. A dart mat oche should remove guesswork, so unclear markings are a genuine drawback.
Step 4: match the mat to your floor
The same mat can behave differently on carpet, laminate, vinyl, tiles or painted garage concrete. Your floor affects grip, flatness, noise and how often the mat needs repositioning.
- Carpet: a heavier mat may settle better, but very soft carpet can make a raised toe bar feel less stable. Check that the mat does not ruck up when you pivot.
- Laminate or wood flooring: look for a backing that resists sliding and check whether the underside is suitable for the floor finish. Avoid dragging grit underneath, as that can mark the surface.
- Vinyl: choose a mat that sits smoothly without sharp edges or hard pressure points. If the floor is delicate, check care guidance from both the mat maker and flooring maker.
- Garage floors: prioritise weight, flatness and wipe-clean practicality. Dust can reduce grip, so clean the floor before judging whether a mat moves too much.
Floor protection is a useful bonus, but a dart mat is not the same as a full wall or surround solution. Dropped darts, bounce-outs and missed doubles can still damage nearby surfaces, so treat the mat as part of the setup rather than the only protective layer.
Step 5: decide how much coverage you actually need
Longer mats create a more defined playing lane and can help protect the area where darts are most likely to land. Shorter mats are easier to store and better for rooms where the board shares space with a sofa, desk, washing machine or exercise gear. The right choice is usually the one you can leave aligned, not simply the biggest one you can squeeze in.
Think about width as well as length. A narrow mat may cover the toe line but leave little room for stance variation. A wider mat gives players more comfortable footing, which helps if you and other household members stand differently. However, it also needs more clear floor space and can look more intrusive in a living room.
If your setup has to disappear between sessions, a roll-up design can be handy. Before relying on that, check whether the mat is likely to retain curled edges after storage. A mat that looks neat online but curls at the corners can become frustrating very quickly.
Step 6: compare material, weight and edge behaviour
Material choice affects feel more than many buyers expect. Rubber-style mats often feel stable underfoot and can help deaden the sound of dropped darts. Fabric-topped or carpet-style mats may feel softer but can pick up fluff and may need more brushing or vacuuming. Some mats are designed more like protective runners, while others are closer to a dedicated darts lane.
Weight matters because a very light mat can shift when players step on and off it. Too much weight, though, can make storage awkward if the room is not dedicated to darts. Edges deserve attention too: raised, curled or poorly finished edges are annoying in normal use and can become a trip nuisance in a family room.
For named examples, products such as the Winmau Xtreme Dart Mat, Target World Champions Dart Mat and Unicorn Professional Dart Mat show the sort of mainstream options many home players compare. Treat them as starting points for checking layout, material, markings and storage rather than assuming any one mat suits every room.
Step 7: test the oche position before committing
Once the mat arrives, do not assume the printed line is correct for your particular board position until you have measured it in place. Set the board height, measure 2.37 m from the board face to the toe line, then align the mat so the line matches that point. If the mat has multiple markings, tape over or ignore the ones you do not use to avoid confusion.
Stand at the line and check your normal throwing posture. Your front foot should sit naturally at the oche without forcing your trailing foot into furniture, a doorway or a sloping floor section. Ask another player to stand there too if the setup is shared; a mat that works for one stance may feel awkward for someone taller, shorter or more side-on.
If you are interested in a purpose-made home-board option, our DartMat Pro throw line mat review looks at how a neat oche upgrade fits into a typical home setup, including the practical details that matter once the mat is on the floor.
Step 8: think about the room around the mat
A dart mat sets the line, but the room decides whether the setup feels good to use. You need a clear throwing lane, sensible lighting, somewhere to put darts between turns and enough space for people to walk without crossing the thrower. In a small room, a mat that looks compact on paper can still feel awkward if it blocks a cupboard or catches a door swing.
Rented homes add another layer. You may want a setup that can be removed without marks, stored quickly and repositioned accurately. In that case, a flat mat with a clear printed line may be more practical than anything fixed to the floor. For broader room-planning tips, especially where permanent changes are limited, see our guide to a rented home darts setup.
Before you buy: quick checks that prevent mistakes
- Board face distance: confirm the oche can be aligned at 2.37 m from the front of the board.
- Mat length: check it fits the available floor space without forcing the thrower into a wall or furniture.
- Line clarity: make sure the correct throwing line is easy to identify at a glance.
- Floor grip: look for details on backing and suitability for your flooring type.
- Edge flatness: avoid mats with obvious curl risks if the room is used by others.
- Storage method: decide whether it will stay down, roll away or be moved between rooms.
- Cleaning: choose a surface you can keep tidy in the room where you actually play.
- Shared use: consider whether guests, children or non-players will walk through the space.
Helpful questions
Can I use a normal floor mat as an oche?
You can use a normal mat for floor protection, but it will not set the throwing distance unless you add an accurate toe line. Measure from the dartboard face and mark the line clearly.
Is a raised oche better than a printed line?
A raised oche gives a more consistent foot stop, while a printed line is easier to live with in shared rooms. For a dedicated darts space, raised can feel better; for a living room, printed is often simpler.
Should the mat start at the wall or under the board?
Do not use the wall as the reference point. The important line is 2.37 m from the face of the dartboard, so the mat should be positioned to match that measurement.
Will a dart mat protect my floor from all damage?
It helps with dropped darts and defines the throwing lane, but it cannot protect every area. Bounce-outs and missed darts can still hit nearby flooring, skirting, surrounds or walls.
What if my mat keeps moving?
Clean the floor, check the backing, and make sure the mat is fully flat before play. If it still shifts, the material may not suit your floor type or the mat may be too light for regular use.
Final thoughts
The best dart mat is the one that makes your throw repeatable without making the room awkward. Start with the official board height and throwing distance, choose the oche style that suits how permanent your setup can be, then check floor grip, edge behaviour and storage. A well-chosen mat should disappear into your routine: unroll it, line it up, stand at the mark and throw with confidence.